
In this short tutorial, we will show how you can connect any MySQL database to Chartbrew. Once we connect the database, we are going to write a few simple queries to fetch some data and create datasets to be visualized in multiple ways.
We are going to assume you have access to a terminal and can run commands using mysql and you have access to the database configuration files. There are plans to add new tutorials using services such as Amazon RDS and Redshift. Subscribe to our newsletter to find out when this happens.
Prepare your MySQL database for remote access
🧑💻
If you run Chartbrew and MySQL on the same machine, feel free to ignore this section.
If you use our managed service at chartbrew.com or you are self-hosting Chartbrew and the database sits on another server, it's essential to enable remote access to your MySQL database. This allows Chartbrew to connect to your database from a different location. Follow these steps to configure your MySQL server:
Edit the MySQL Configuration File
First, you need to allow MySQL to listen for connections from any host. This is done by editing the MySQL configuration file (my.cnf or my.ini, depending on your system).
- On Linux, the file is usually located at
/etc/mysql/my.cnf. - On Windows, you might find it at
"C:\ProgramData\MySQL\MySQL Server X.Y\my.ini".
Find the bind-address directive and change its value to 0.0.0.0
[mysqld]
bind-address = 0.0.0.0
This setting tells MySQL to accept connections on all IP addresses. Be aware this might expose your database to the internet; ensure you have proper firewall rules in place.
Restart MySQL Service
Apply the changes by restarting the MySQL service.
- On Linux, use:
sudo systemctl restart mysql - On Windows, restart the service through the Services management console or by running
net stop mysqlfollowed bynet start mysqlin the Command Prompt as an administrator.
Create a Dedicated User for Chartbrew
It's a good security practice to create a dedicated user for Chartbrew with access limited to the necessary databases. Log into the MySQL shell as the root user:sqlCopy codemysql -u root -p
Then, create a new user and grant it permissions. Replace chartbrew_user, secure_password, and your_database with your desired username, a strong password, and the database name Chartbrew will access, respectively.
CREATE USER 'chartbrew_user'@'%' IDENTIFIED BY 'secure_password';

GRANT ALL PRIVILEGES ON your_database.* TO 'chartbrew_user'@'%';

FLUSH PRIVILEGES;
The '%' host wildcard allows this user to connect from any host. For improved security, replace it with the specific IP address of your Chartbrew server if known.
Configure Firewall (Optional but Recommended)
If your server is protected by a firewall, you'll need to allow incoming connections on the MySQL default port (3306) from the Chartbrew server's IP address.
🔑
If you use our managed service at chartbrew.com, enter
89.39.106.86as the IP address
- On Linux with UFW (Uncomplicated Firewall), you could do:
sudo ufw allow from [Chartbrew_IP_Address] to any port 3306
- On Windows, add an inbound rule through the Windows Firewall to allow TCP connections on port 3306. Read the next section for more details on this.
Open Windows Firewall Settings
- Press the Windows key, type "Windows Defender Firewall", and press Enter.
- In the left pane, click on "Advanced settings" to open the Windows Firewall with Advanced Security window.
Navigate to Inbound Rules:
- In the Windows Firewall with Advanced Security window, look on the left pane and click on "Inbound Rules".
Create a New Rule:
- On the right pane, click on "New Rule..." to start the New Inbound Rule Wizard.
Select Rule Type:
- Select "Port" as the type of rule to create and click "Next".
Specify Port and Protocol:
- Ensure "TCP" is selected as the protocol.
- Select "Specific local ports" and enter "3306" as the port number for MySQL. Click "Next".
Allow the Connection:
- Choose "Allow the connection" and click "Next".
Profile Selection:
- Apply the rule to the appropriate profiles (Domain, Private, Public). It's common to select all, but choose based on your security policy and network setup. Click "Next".
Name and Describe Your Rule:
- Give your rule a name, such as "MySQL 3306 Inbound" or something descriptive.
- Optionally, provide a description that explains this rule allows MySQL connections. This is helpful for future reference. Click "Finish".
Your Windows Firewall is now configured to allow inbound TCP connections on port 3306, facilitating remote access to your MySQL server from Chartbrew. Remember, this adjustment makes your MySQL server reachable over the network; ensure you've secured it with strong passwords and consider restricting access to specific IP addresses for enhanced security.
Connect the MySQL database to Chartbrew
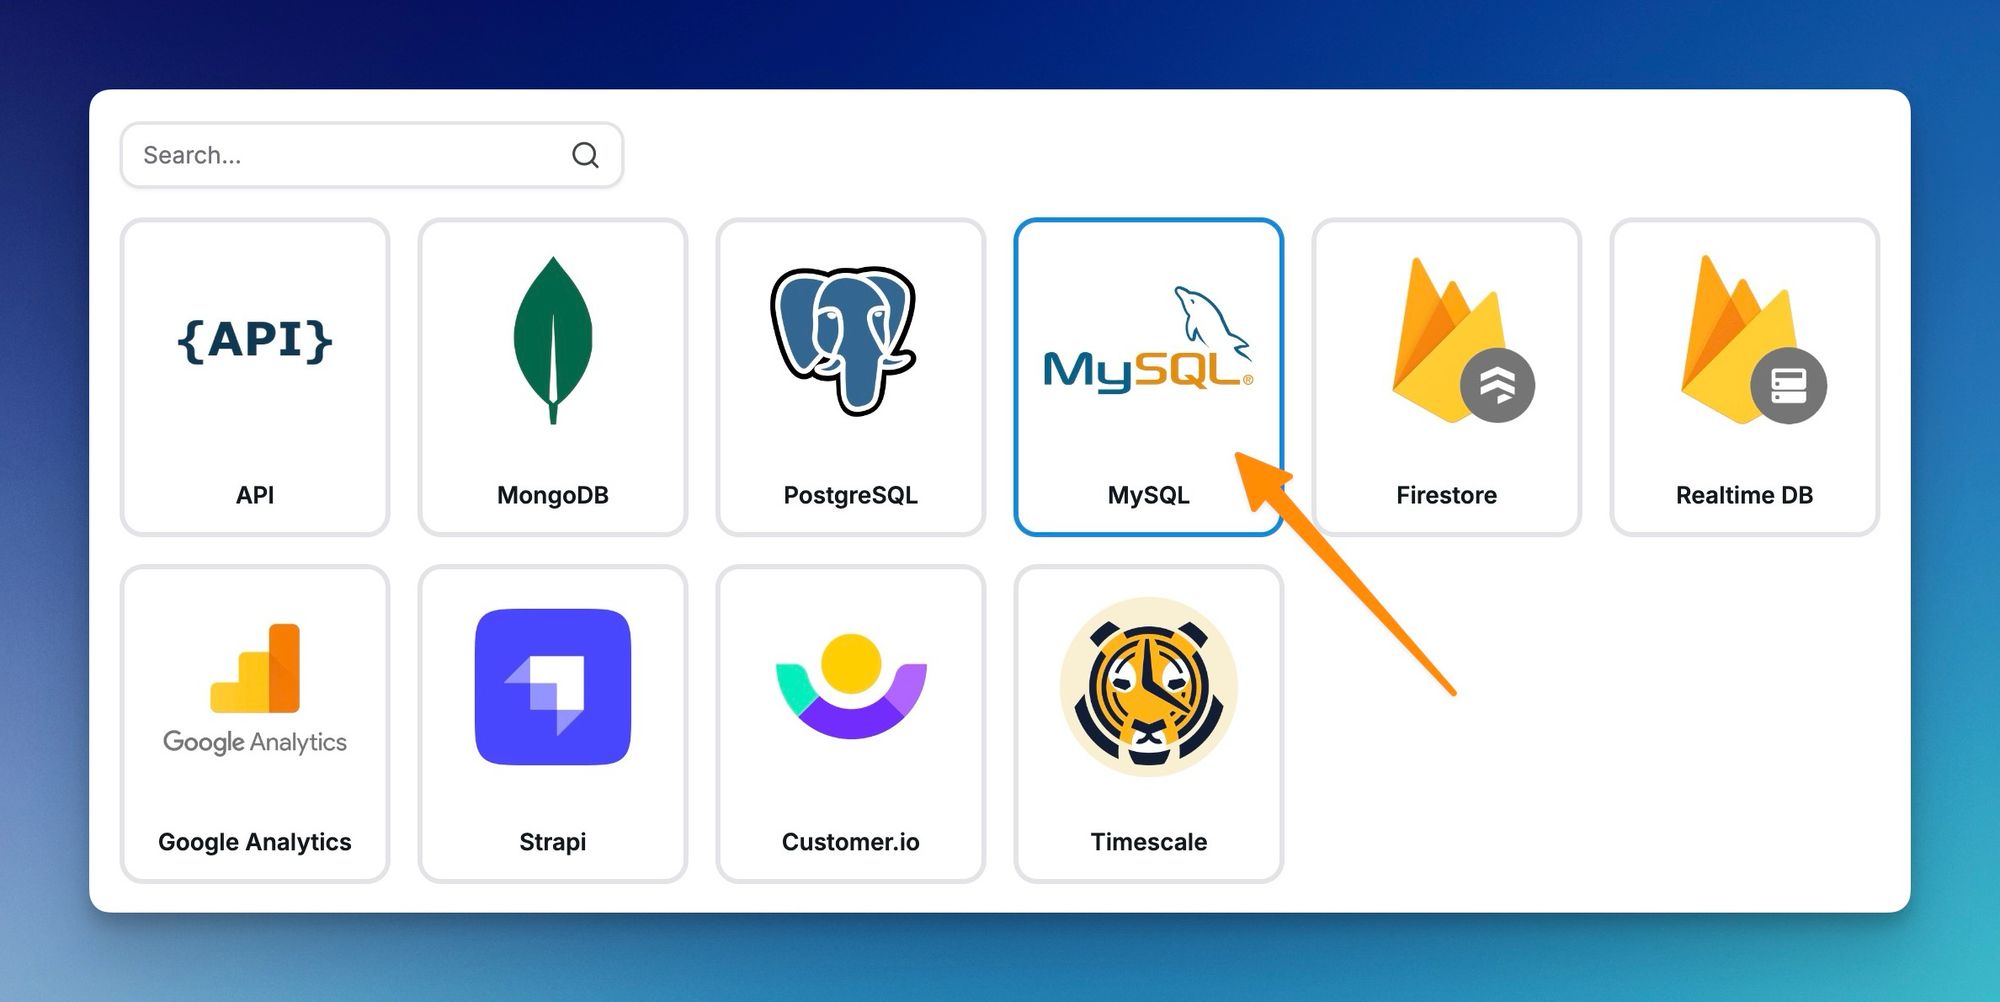
Now that we configured the MySQL database, we can head over to Chartbrew to create a new connection. From the Connections menu, click on "Create connection" and select MySQL from the list.
The connection form will ask for a connection string. Alternatively, it also allows a form-based approach to creating the connection. If you prefer the connection string way, it needs to be formatted like below. (make sure to replace all the information with your credentials, host, and database)
mysql://username:[email protected]:3306/dbname
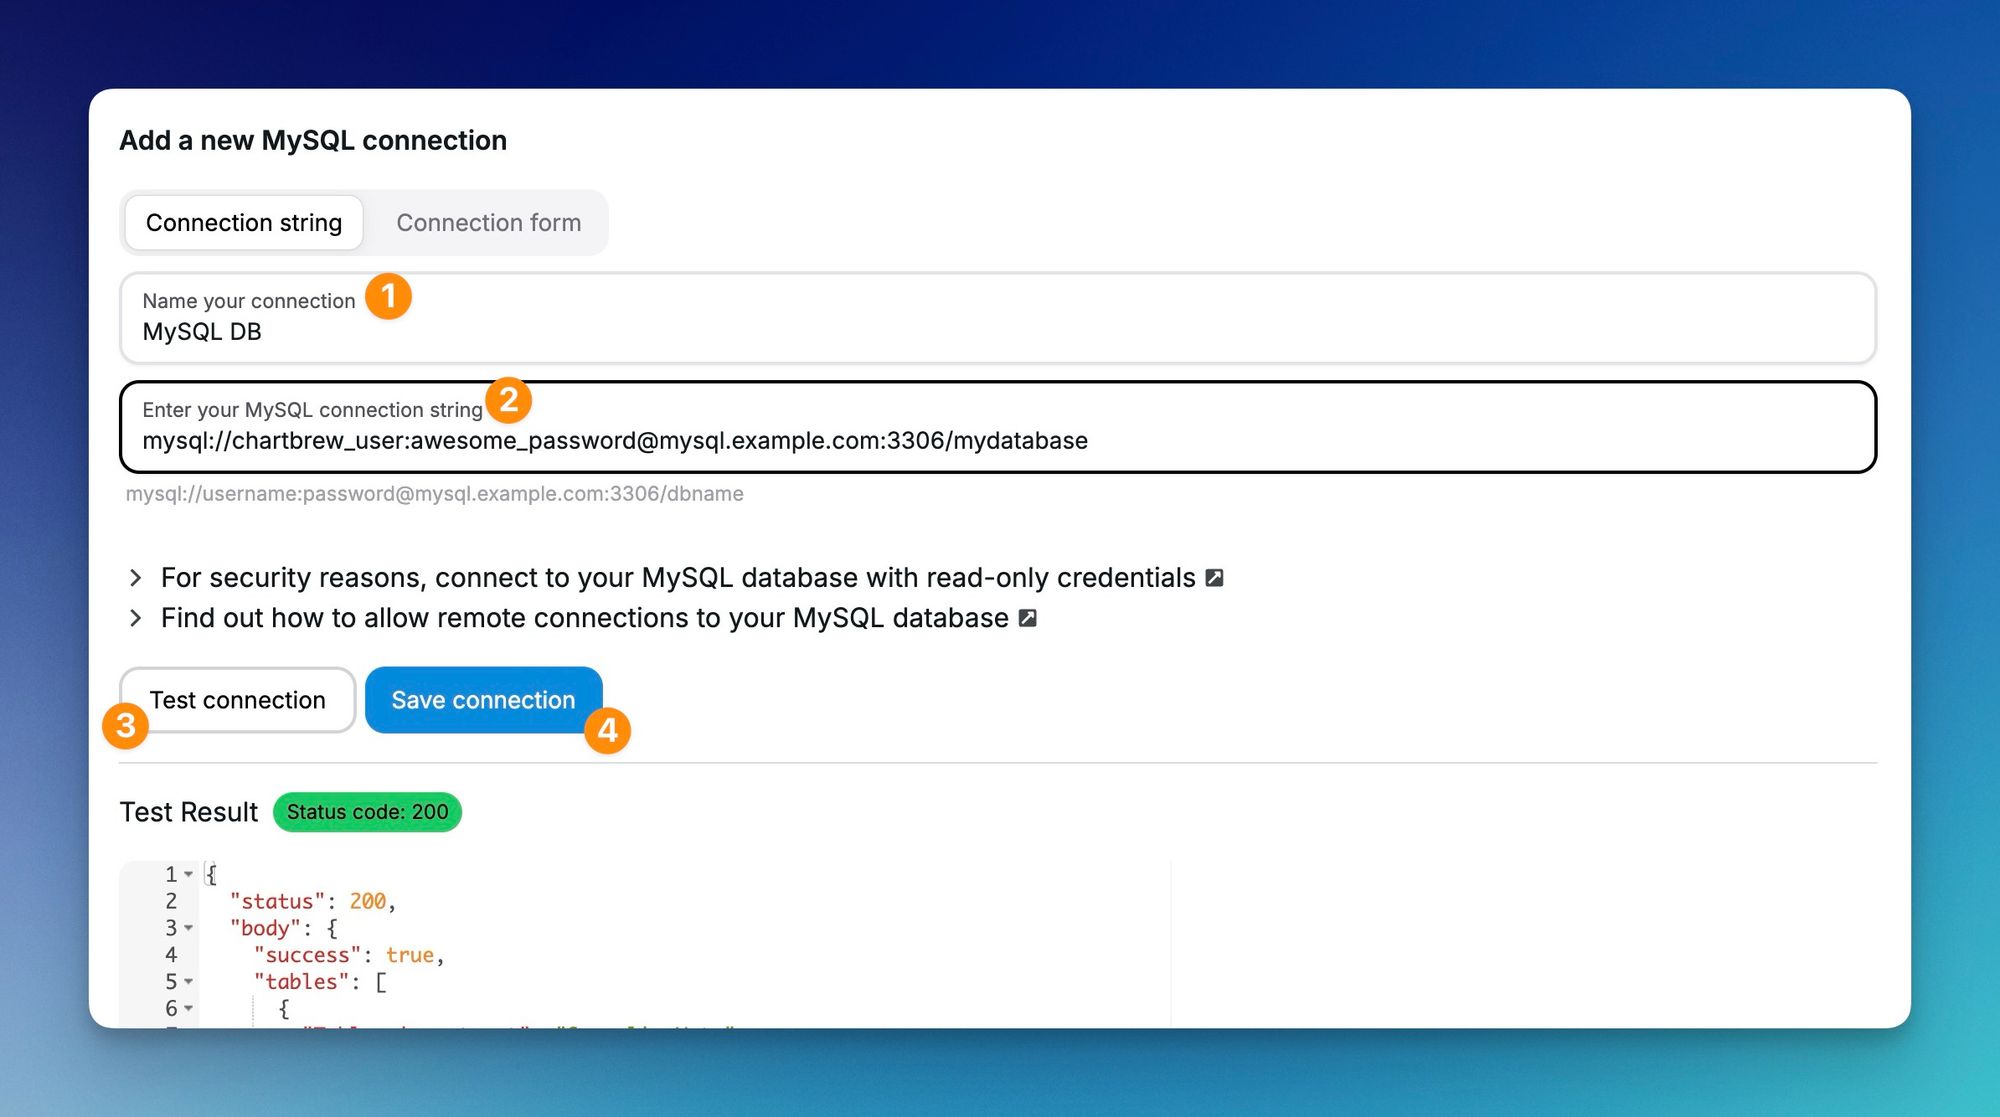
Before you save the connection, you can test to see if Chartbrew can fetch your table configurations in JSON format. If you encounter any errors, make sure the connection string has the right information and that your database can be accessed remotely if your access is from outside your server.
When you're ready, press the Save connection button, and let's create our first dataset!
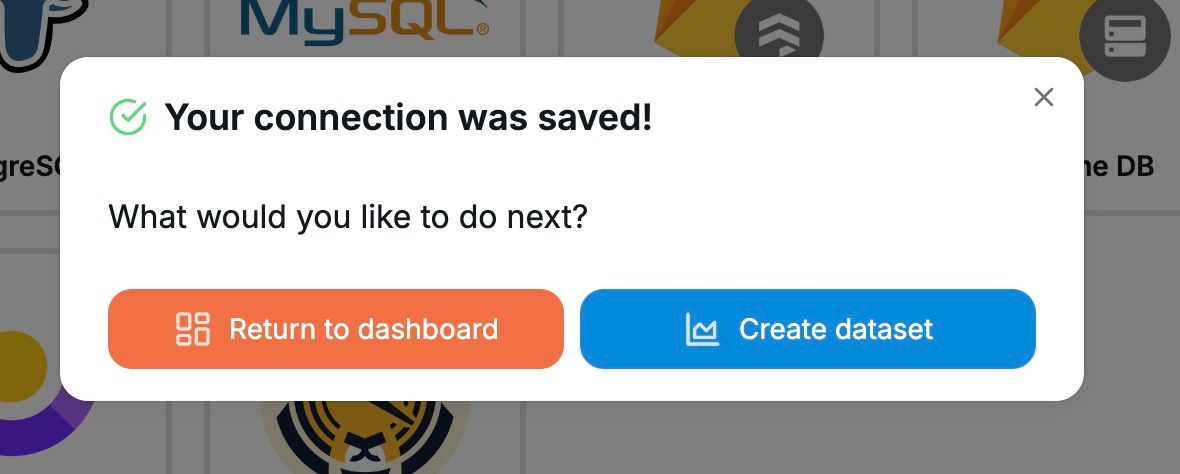
Press on the Create dataset button to proceed
Creating a MySQL dataset in Chartbrew
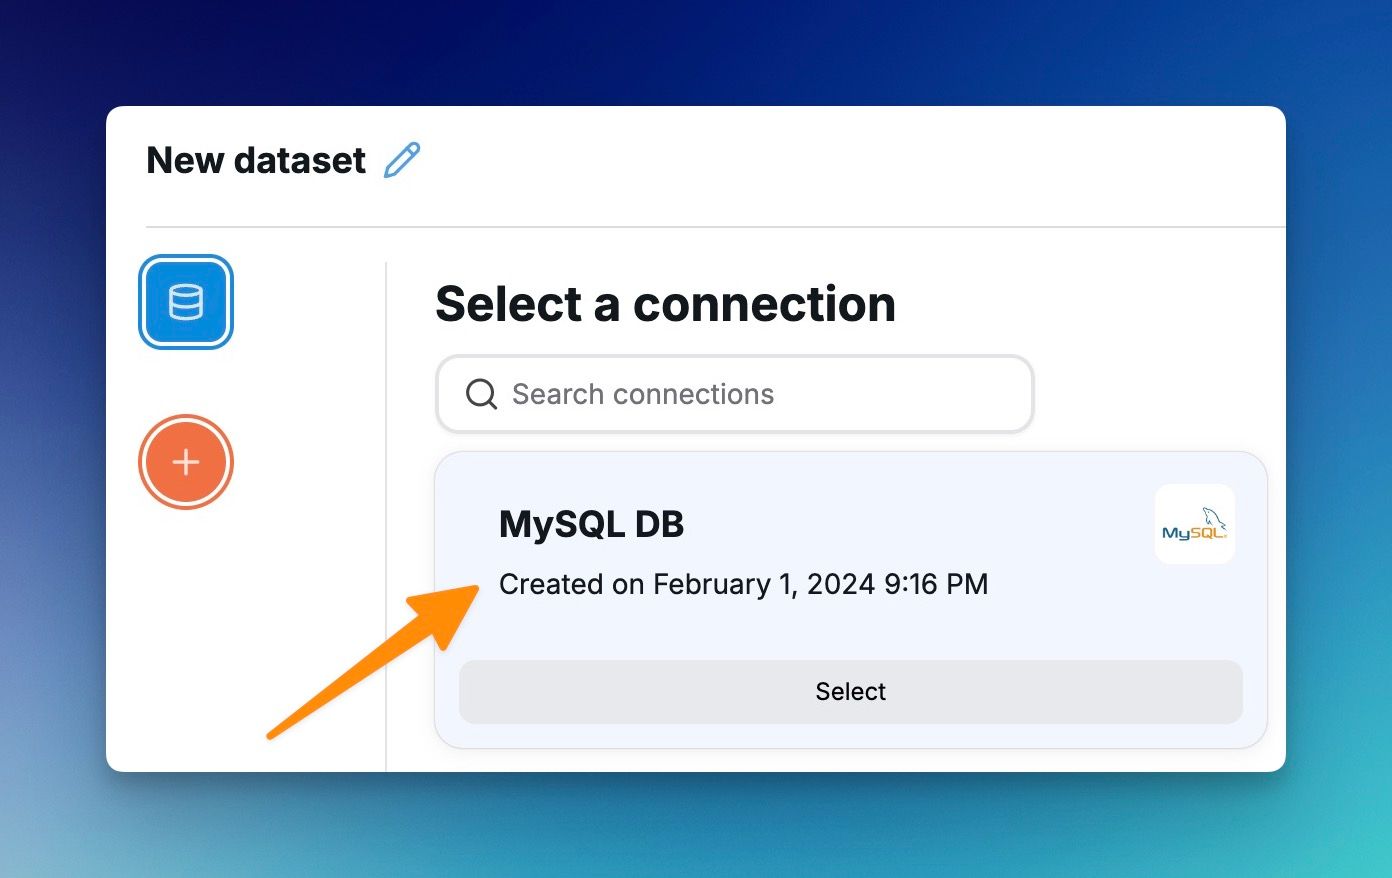
The first step when creating a dataset is to select a connection. More connections can be added to the same dataset later. Chartbrew can join data from multiple data sources to build a dataset. But for now, let's select the MySQL connection we just created.
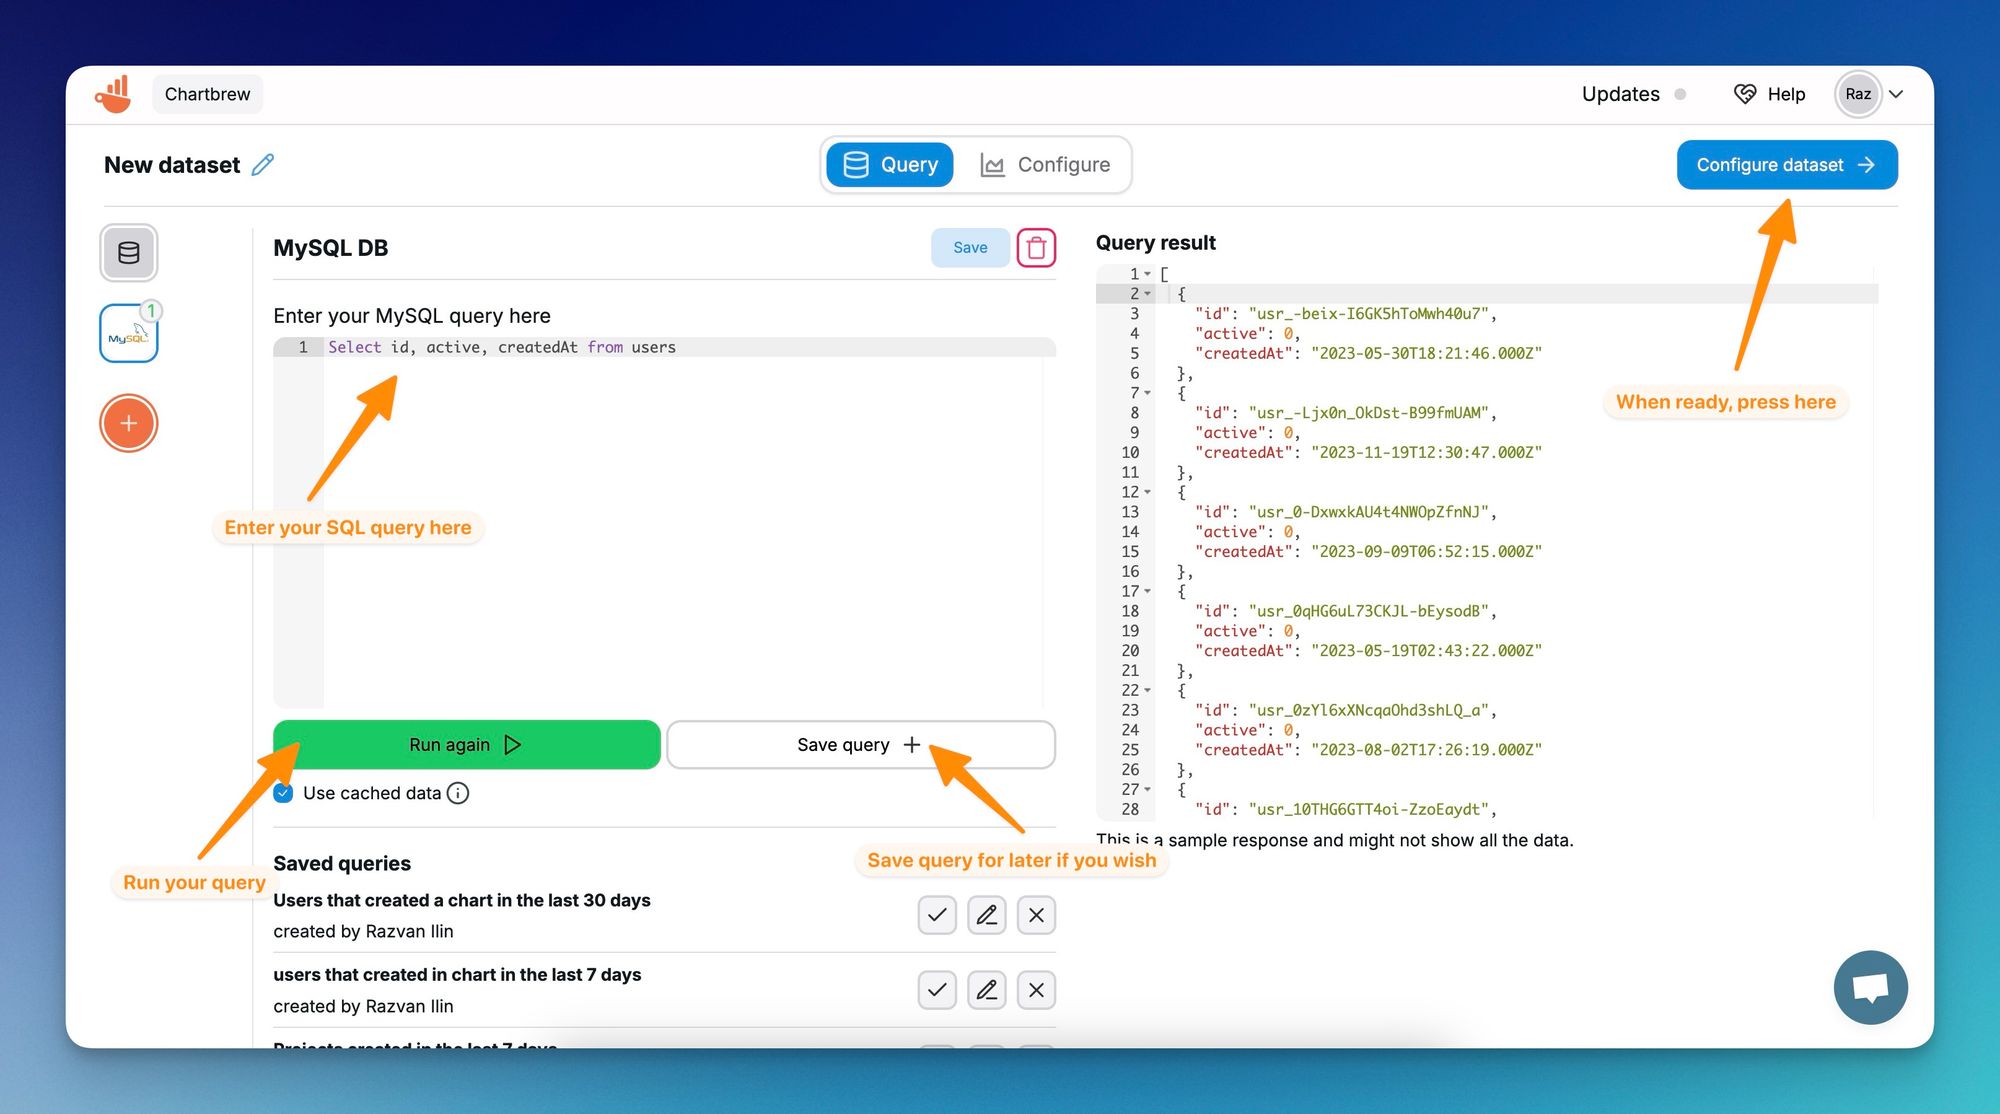
The MySQL dataset builder in Chartbrew lets you write SQL queries to fetch your data. To get your dataset ready, do the following:
- Write your SQL query
- Run the query and check your data
- (optional) Save your query to use it later for other datasets
- Click the Configure dataset button to proceed to the configuration step
When configuring a dataset, it's important to choose the Dimension, Metric, and Operation to visualize the desired data. In the example below, the dimension is the creation date of the users, the metric is the unique ID of each user, and the operation is Count. The chart then becomes a time series showing how many registrations are happening each day.
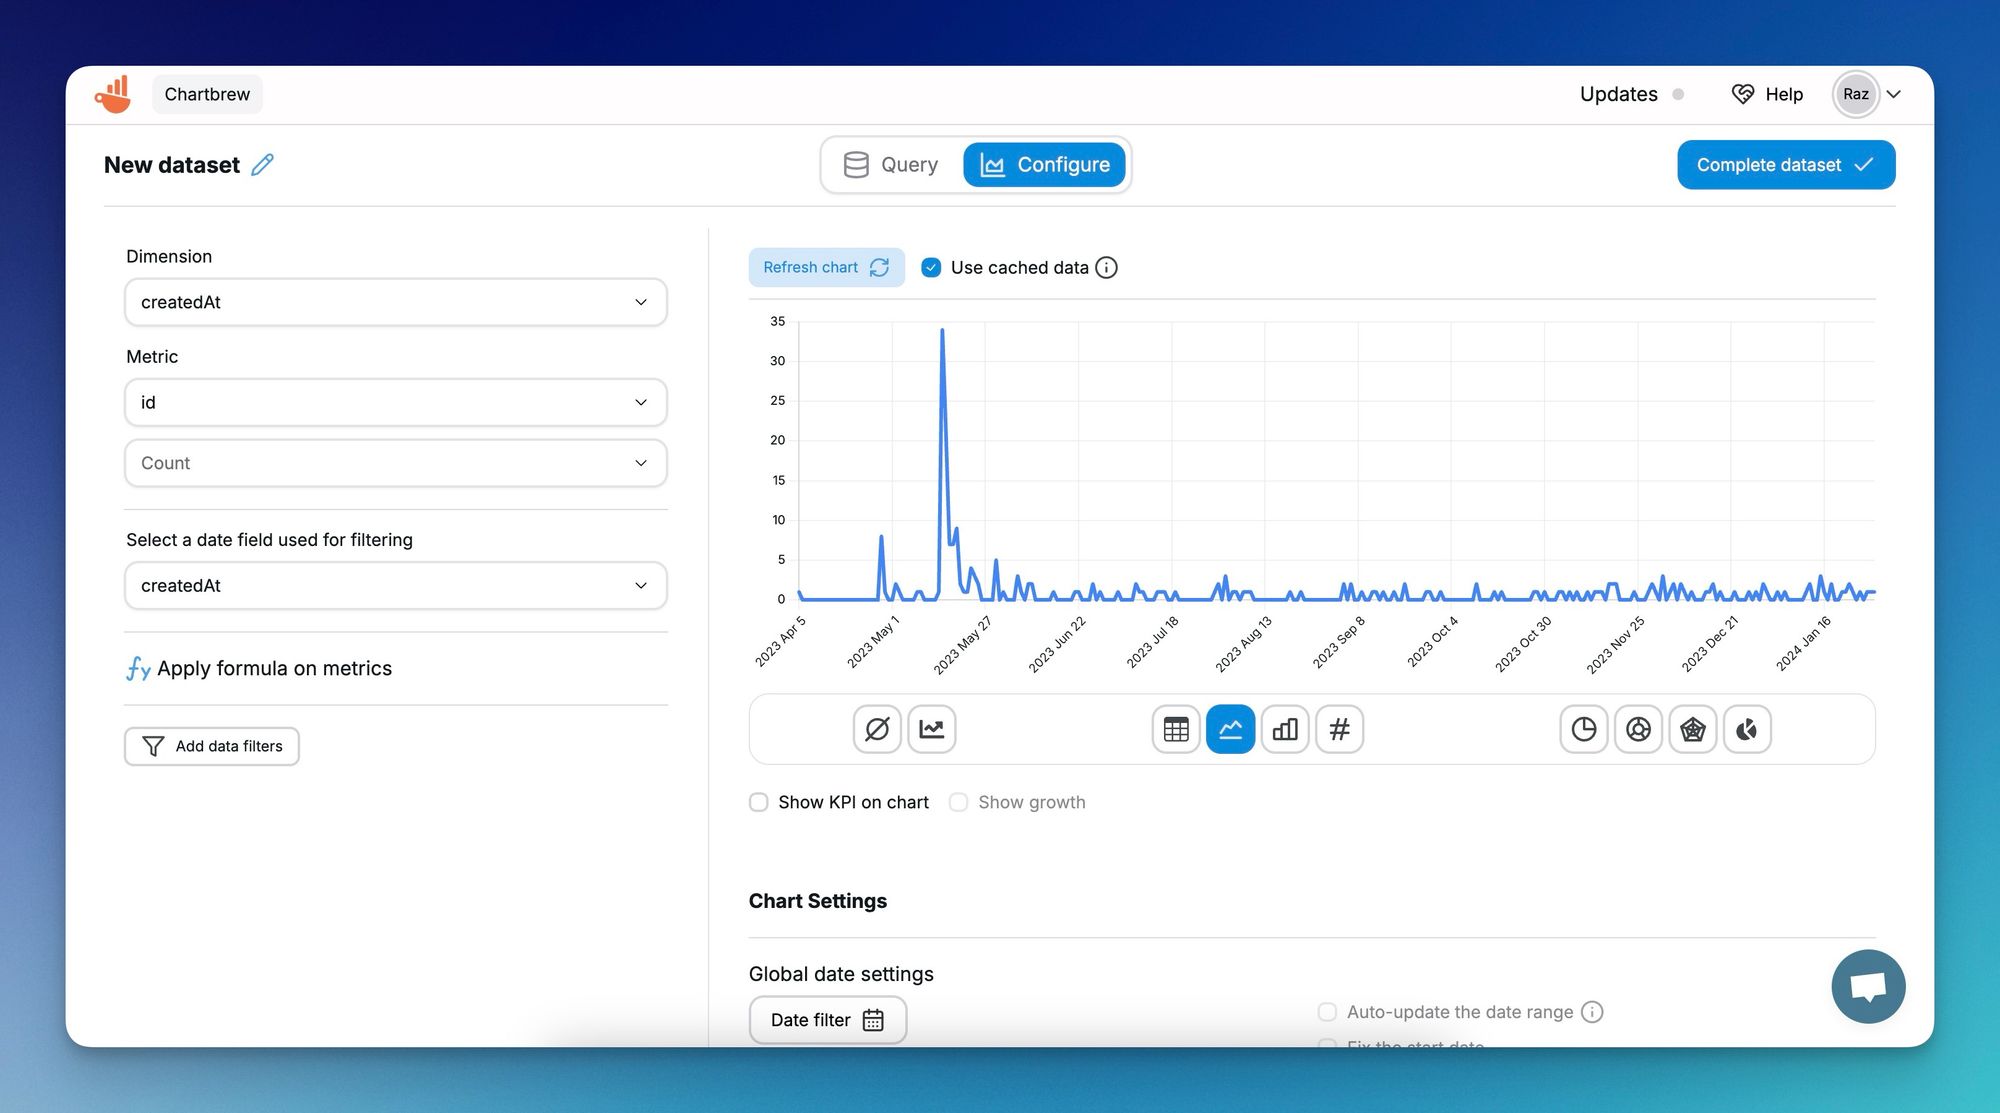
The configuration screen acts as a preview for different charts as well. You can play around with different options and when you're ready, click on the Complete dataset to save your work and create your first chart using the settings you just created.
When clicking the Complete dataset button, you can choose to create the chart you configured in one of your projects. If you do that, the chart will be added at the end of your dashboard like this:

Create more charts from the same dataset
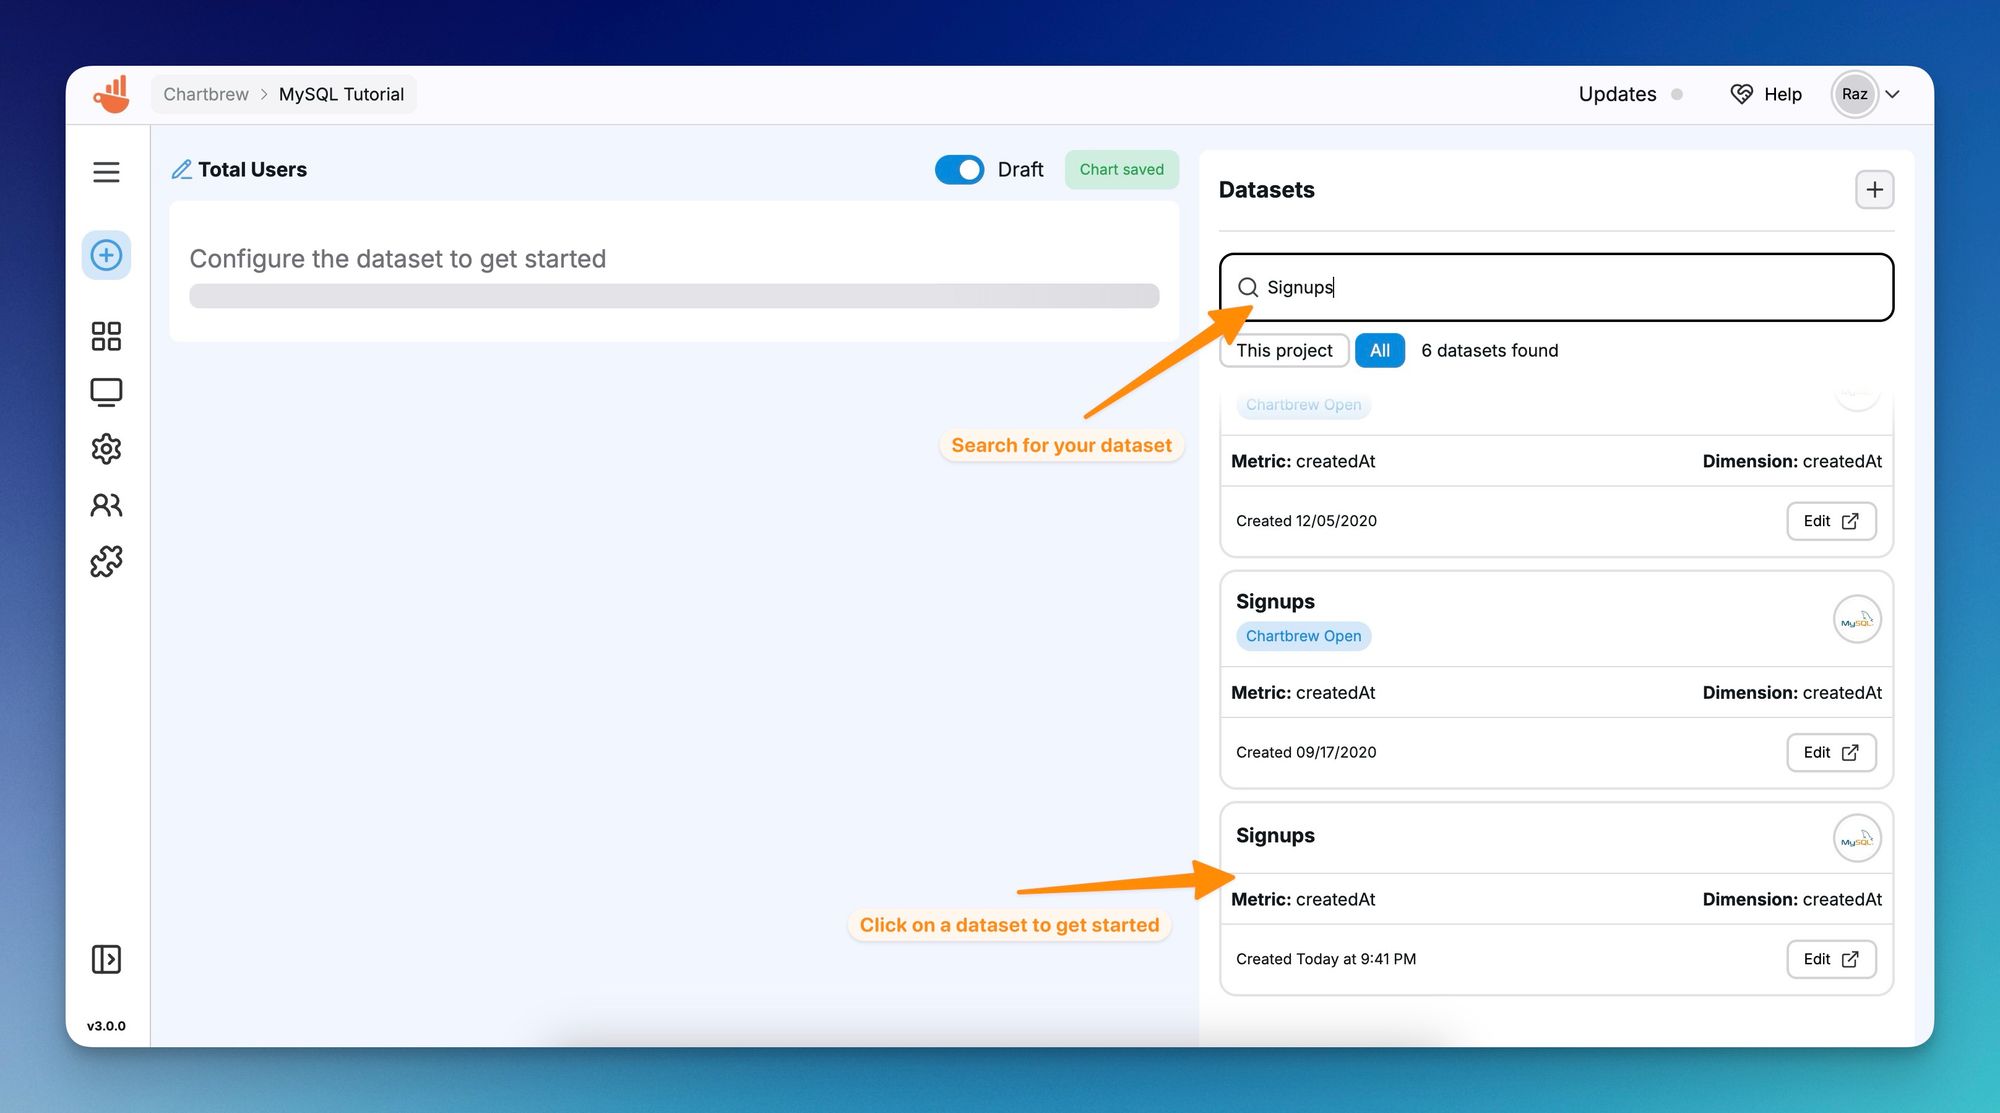
If you want to add more charts to the dashboard from the same dataset, you can click the "+" button on the sidebar.

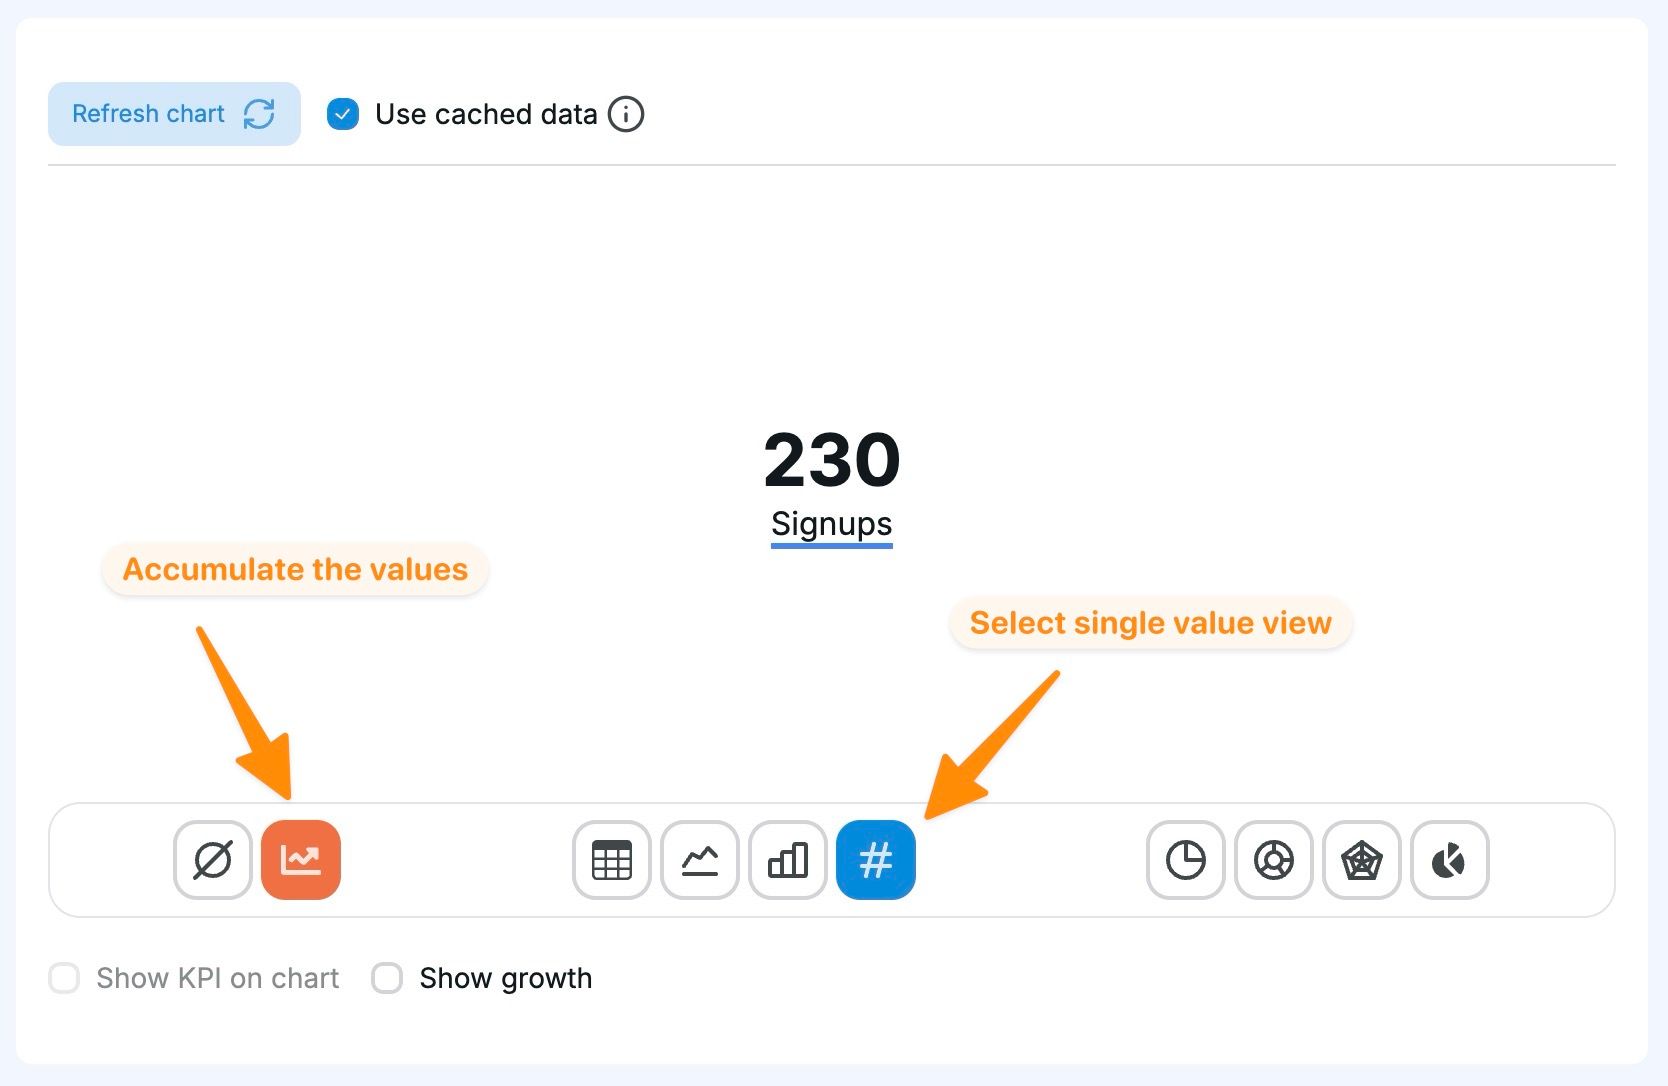
In the chart editor, select a dataset to get started. In this example, we are going to select the same dataset we created previously and aim to create a KPI widget to show the total number of users.
Since the dataset displays the values as a time series, we want to accumulate the values to get the total for a KPI view.
Next steps
To visualize all your data in MySQL, it is recommended to create multiple datasets from different tables in your database. Chartbrew charts support one or more datasets so you can create more advanced visualizations such as stacked bar charts and multi-KPI widgets.
Once you created the perfect dashboard, learn how to create sharable reports so you can embed the visualizations on other sites, share them with stakeholders, or simply display them on the company's monitors.
