How to deploy Chartbrew on Render
You can use Render to deploy your Chartbrew application for free. This tutorial will show you all the steps to get your visualization stack up and running.

Render is getting a lot of attention in the developer world since Heroku decided to sunset their free plans. This tutorial will show you how to deploy Chartbrew on Render so you can add a data visualization platform to your stack for free.
If you are interested in deploying the project on Heroku, you can read the tutorial over here:
 Razvan Ilin
Set up a database on Render (optional)
This step is not required if you have a MySQL or Postgres database running somewhere else. Render gives you 90 days of free access to a Postgres database, so in. this tutorial we are going to show you how you can use this service to store the Chartbrew data.
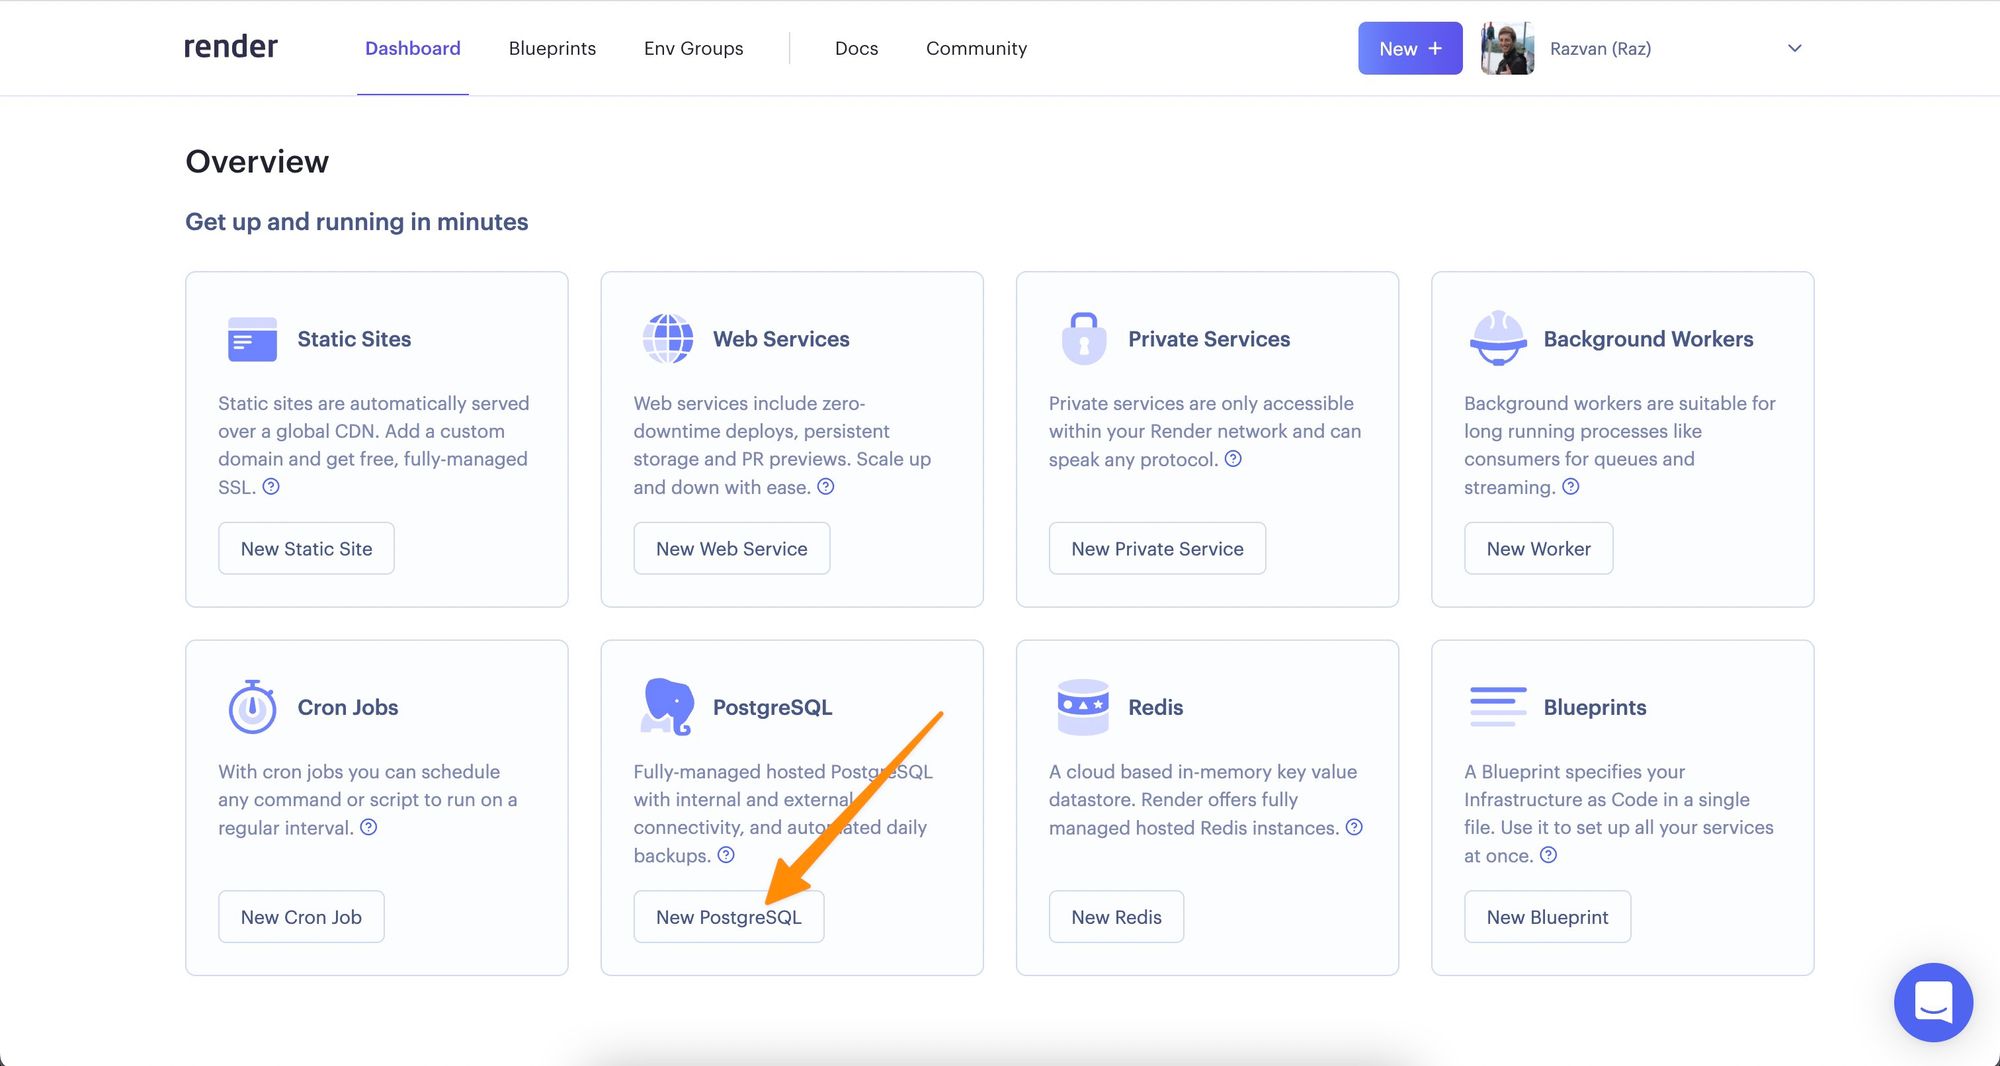
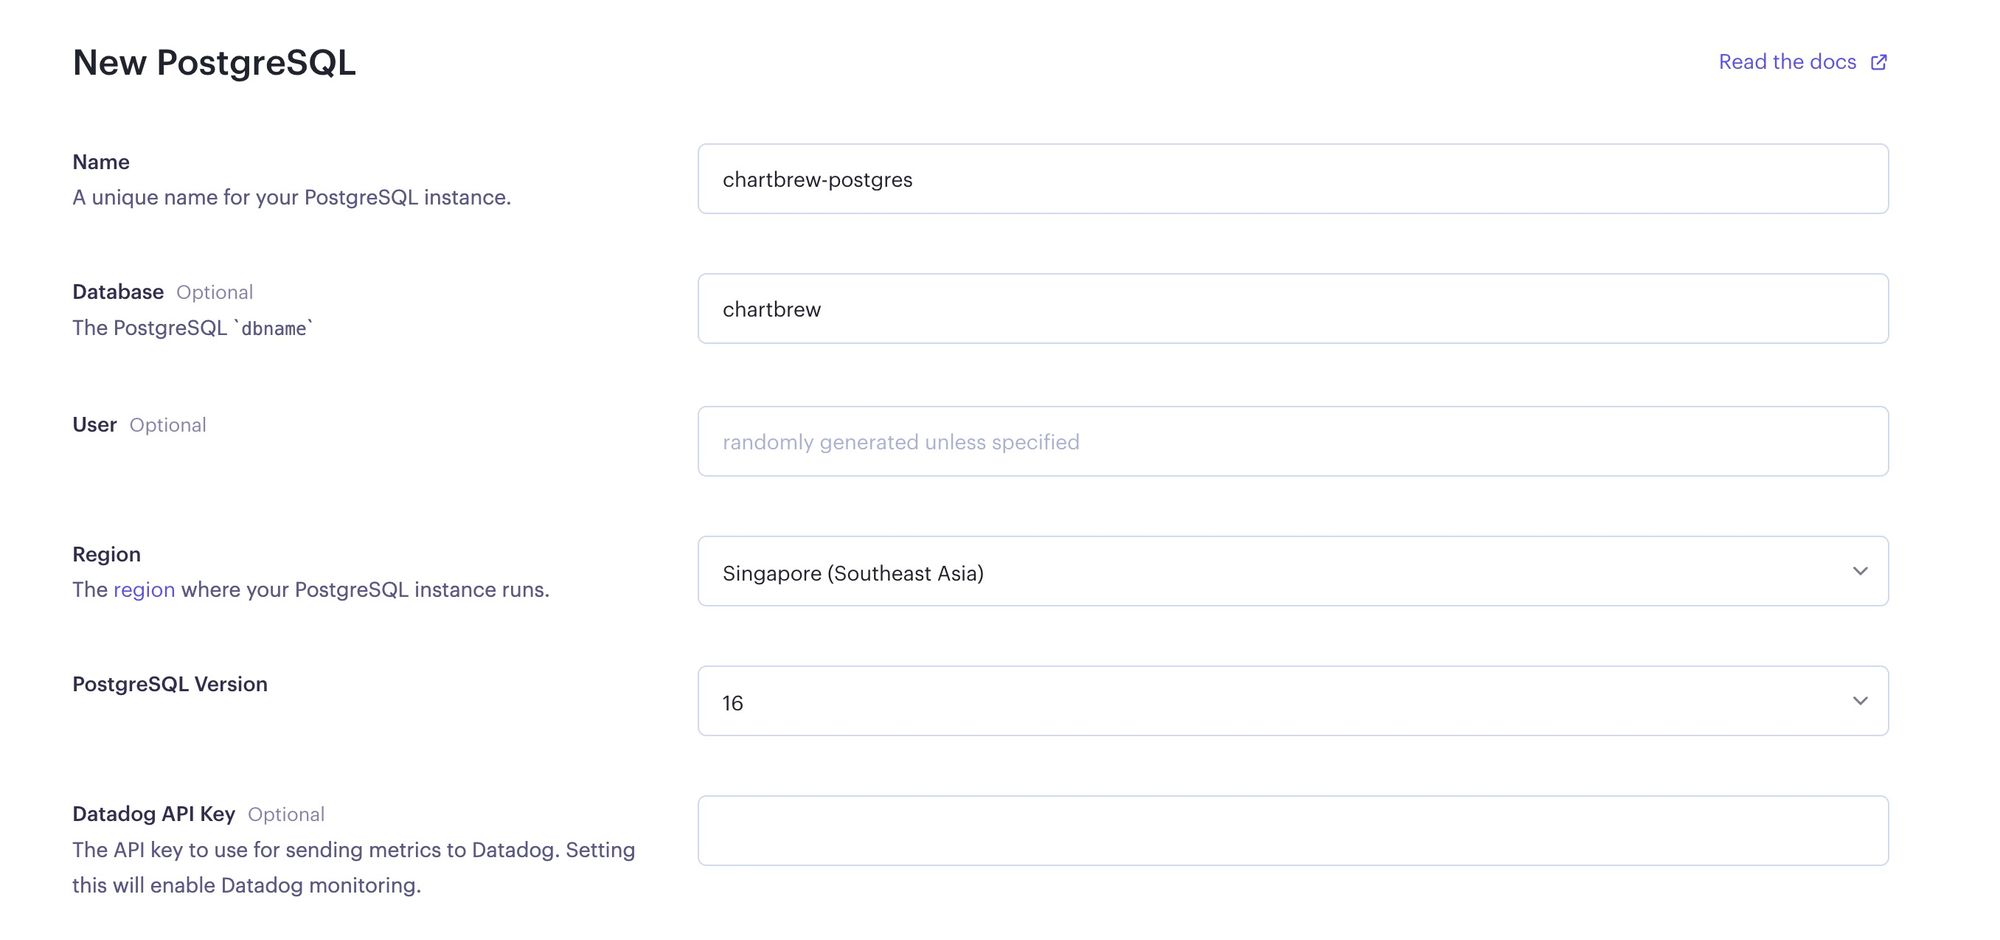
From your Render dashboard, select the option to create a Postgres database and proceed to fill in the form as per your requirements:
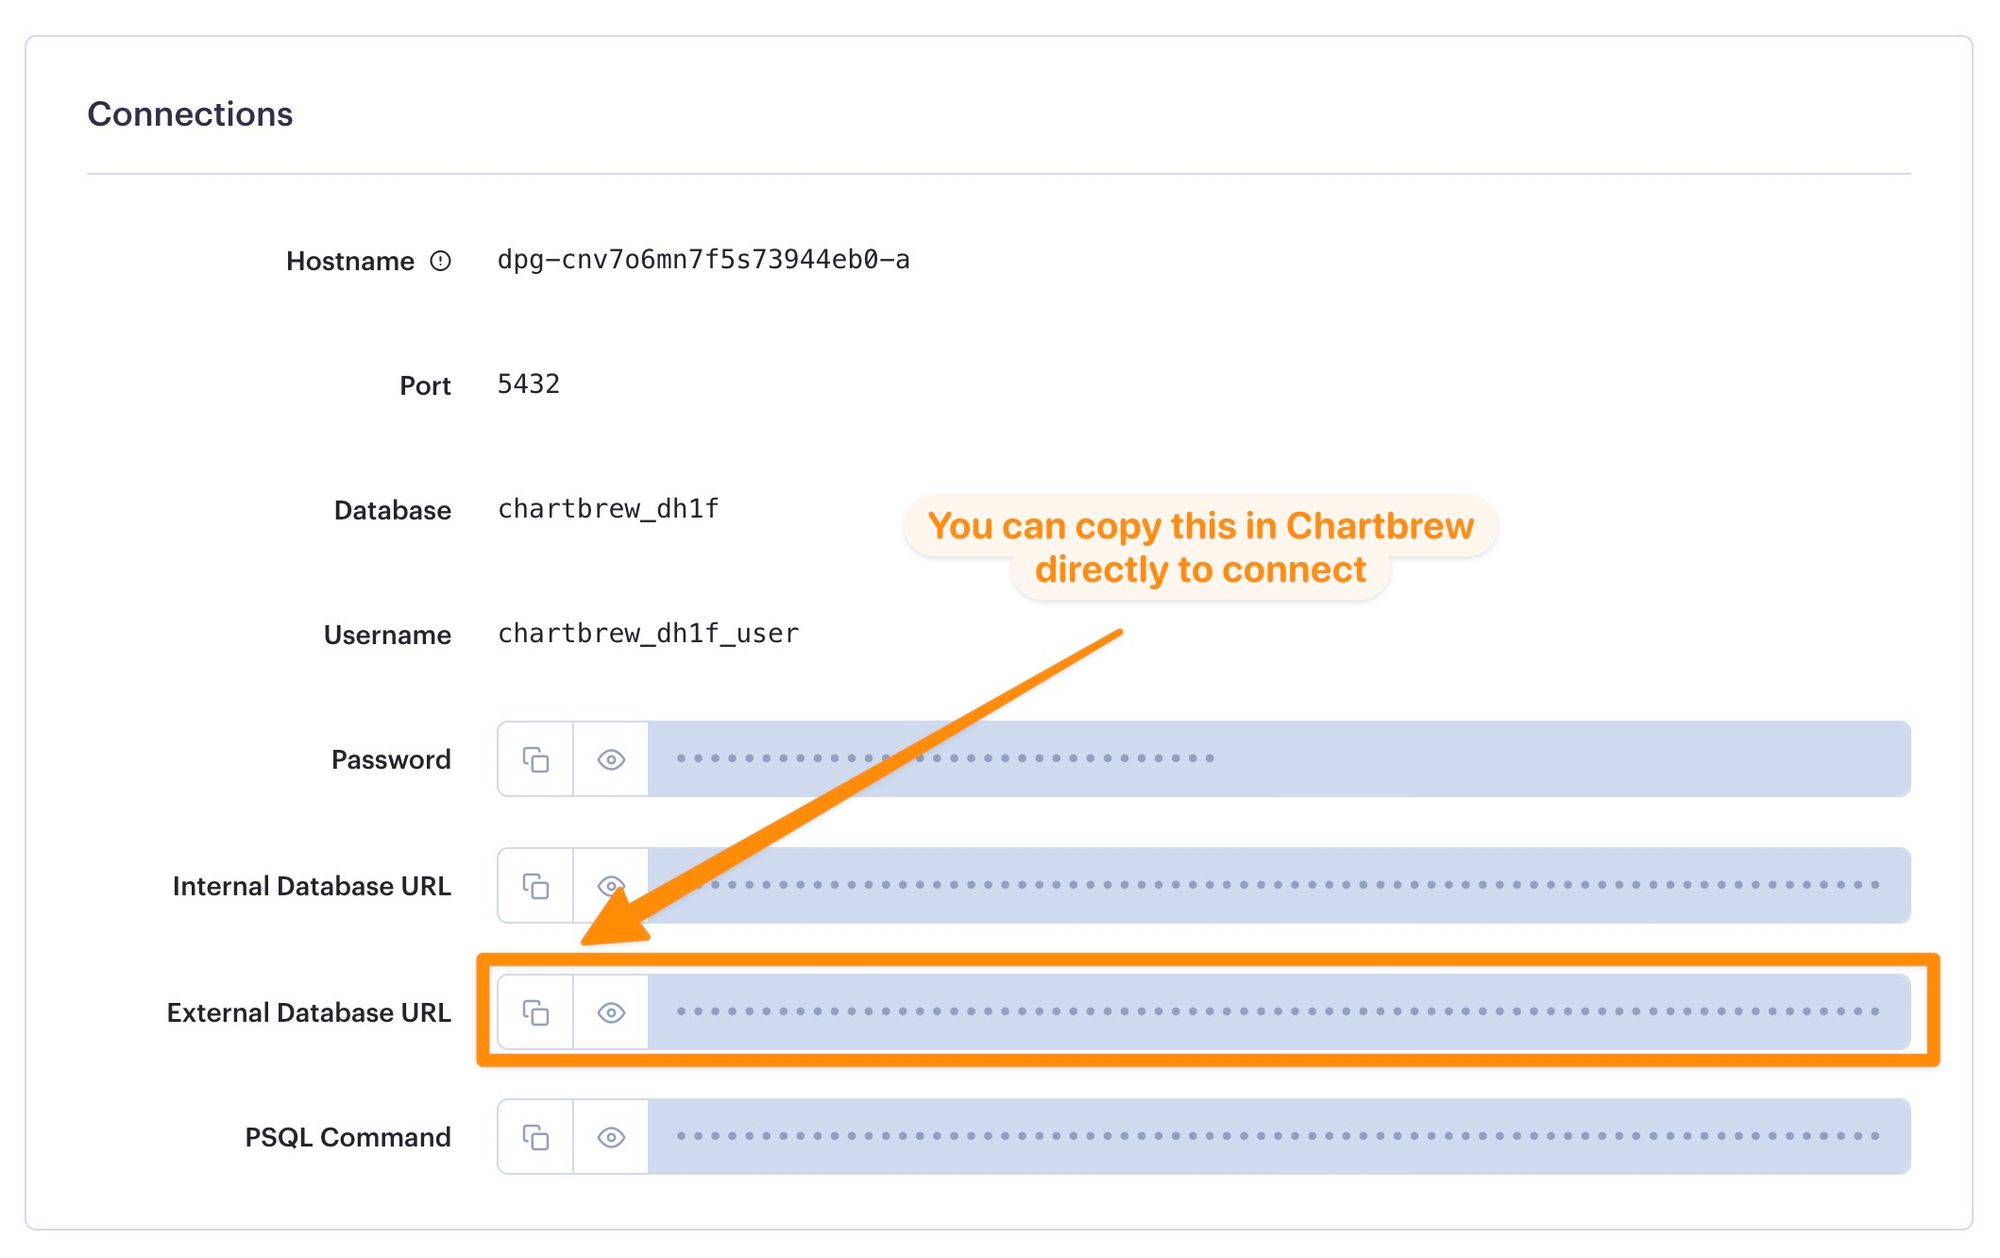
Render will then create a database for you and you will receive the connection options we will use later. From this list, we will need the following:
- Hostname
- Port
- Database
- Username
- Password
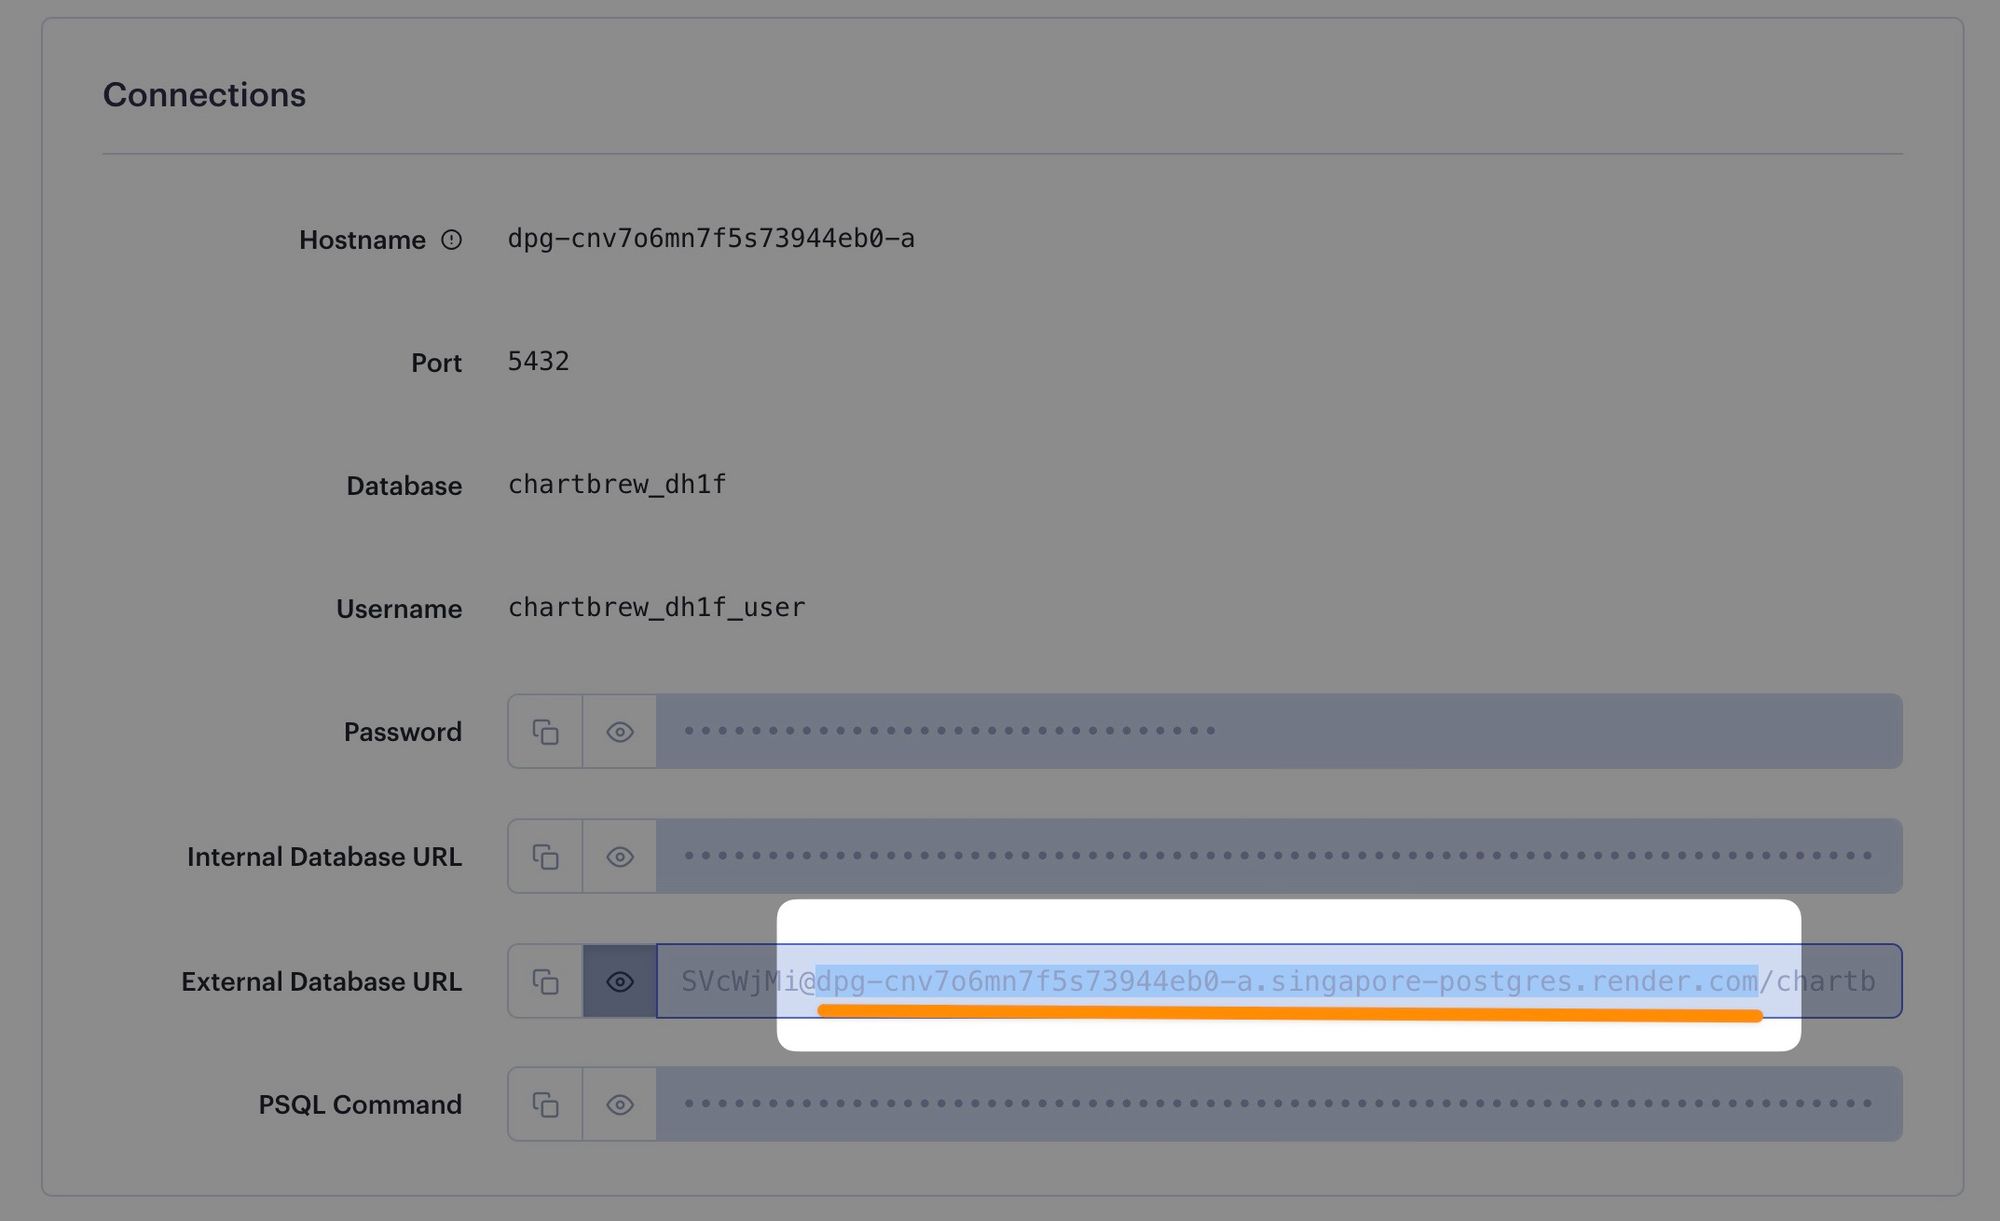
When connecting from Chartbrew, we need the External Database URL which we can copy directly from this section.
Deploy the Chartbrew backend on Render
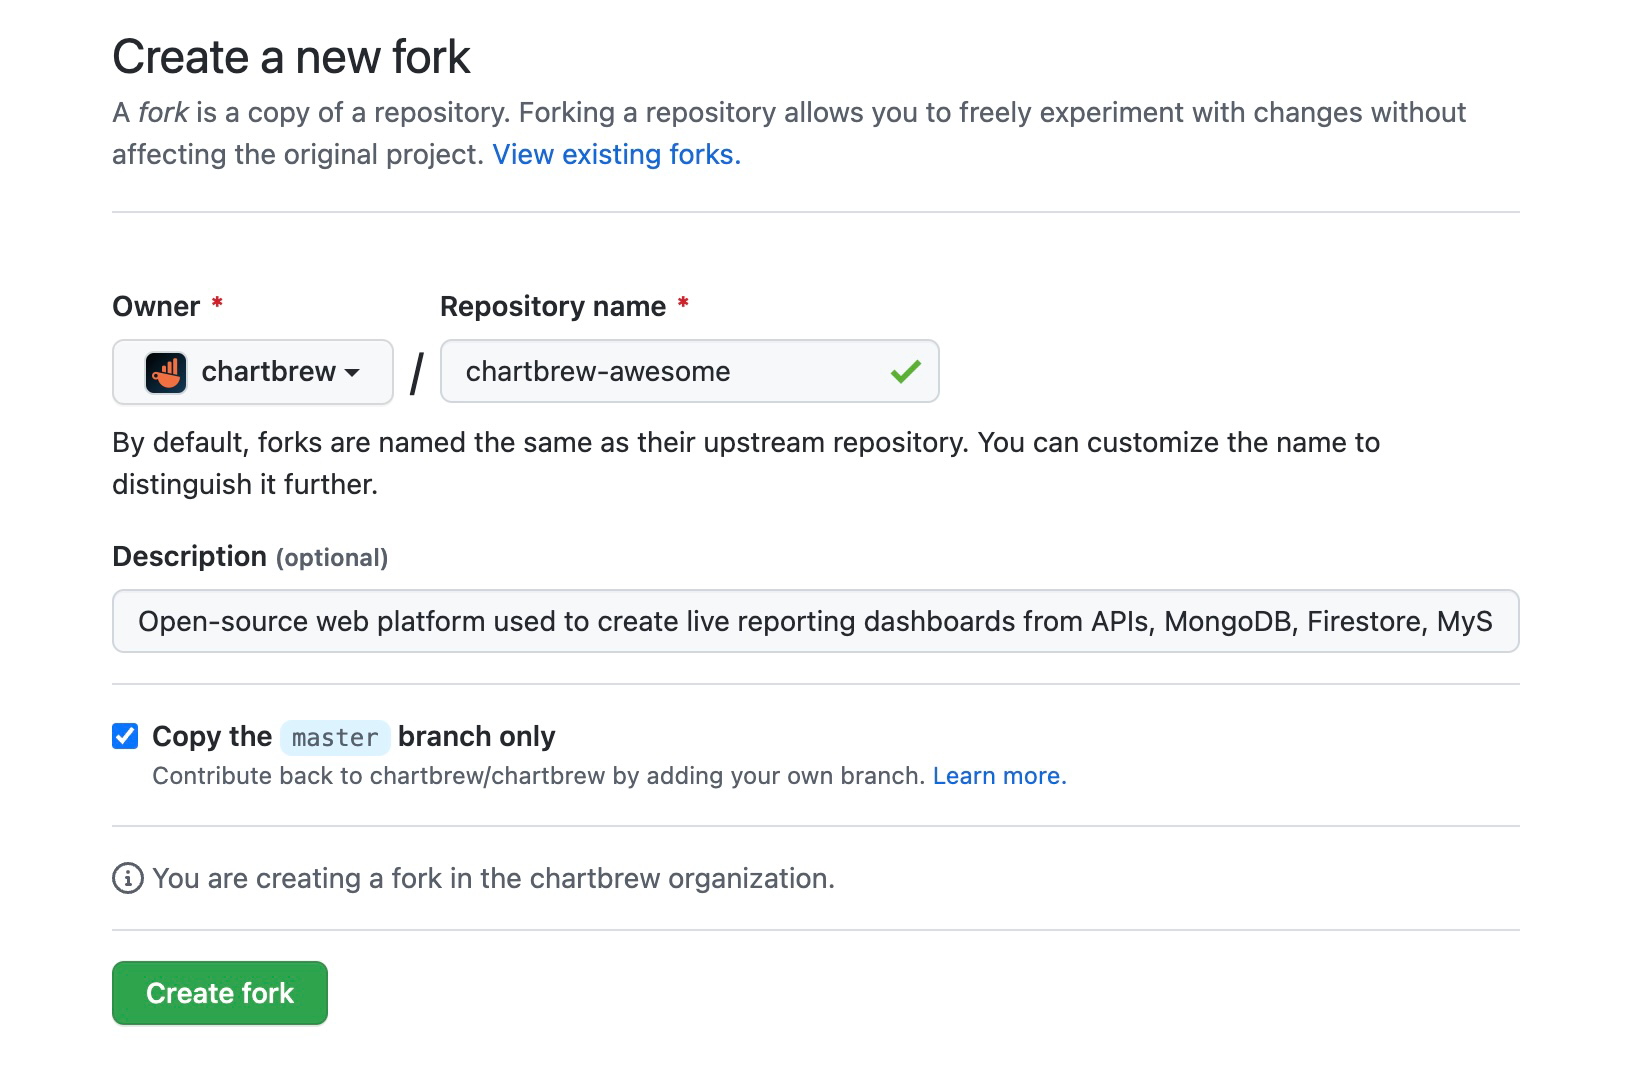
You will first need a copy of Chartbrew in your GitHub or Gitlab account. If you are using GitHub, you can fork the repository from here directly:

On the fork screen, select your account and give any name you want for the repository:
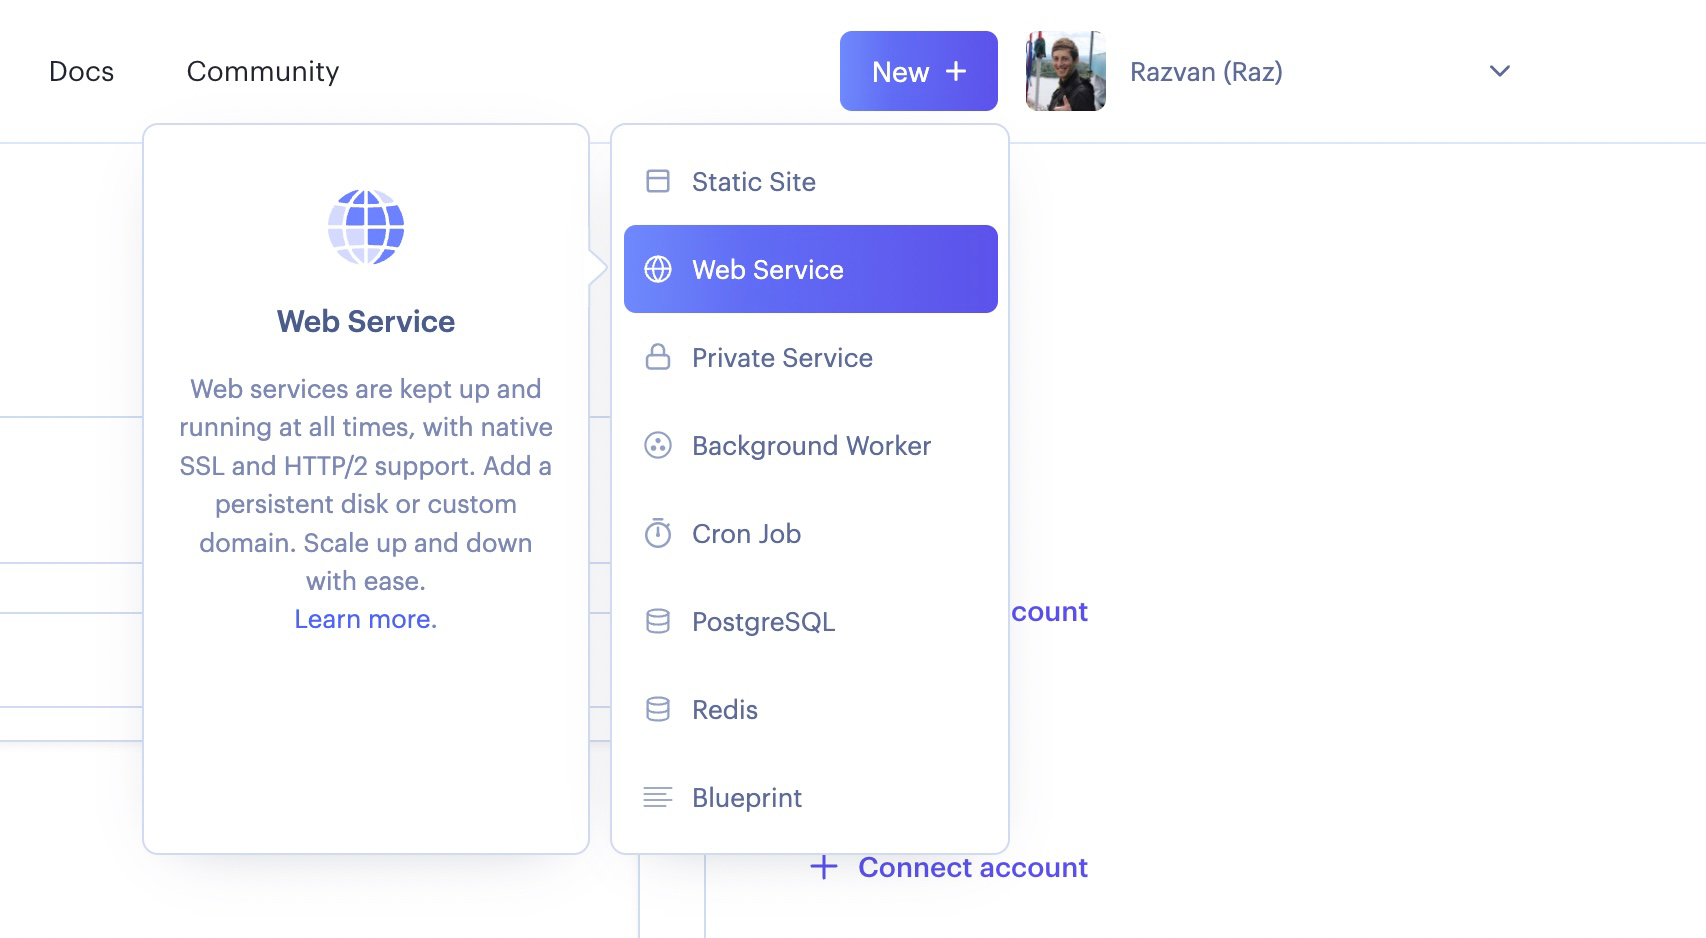
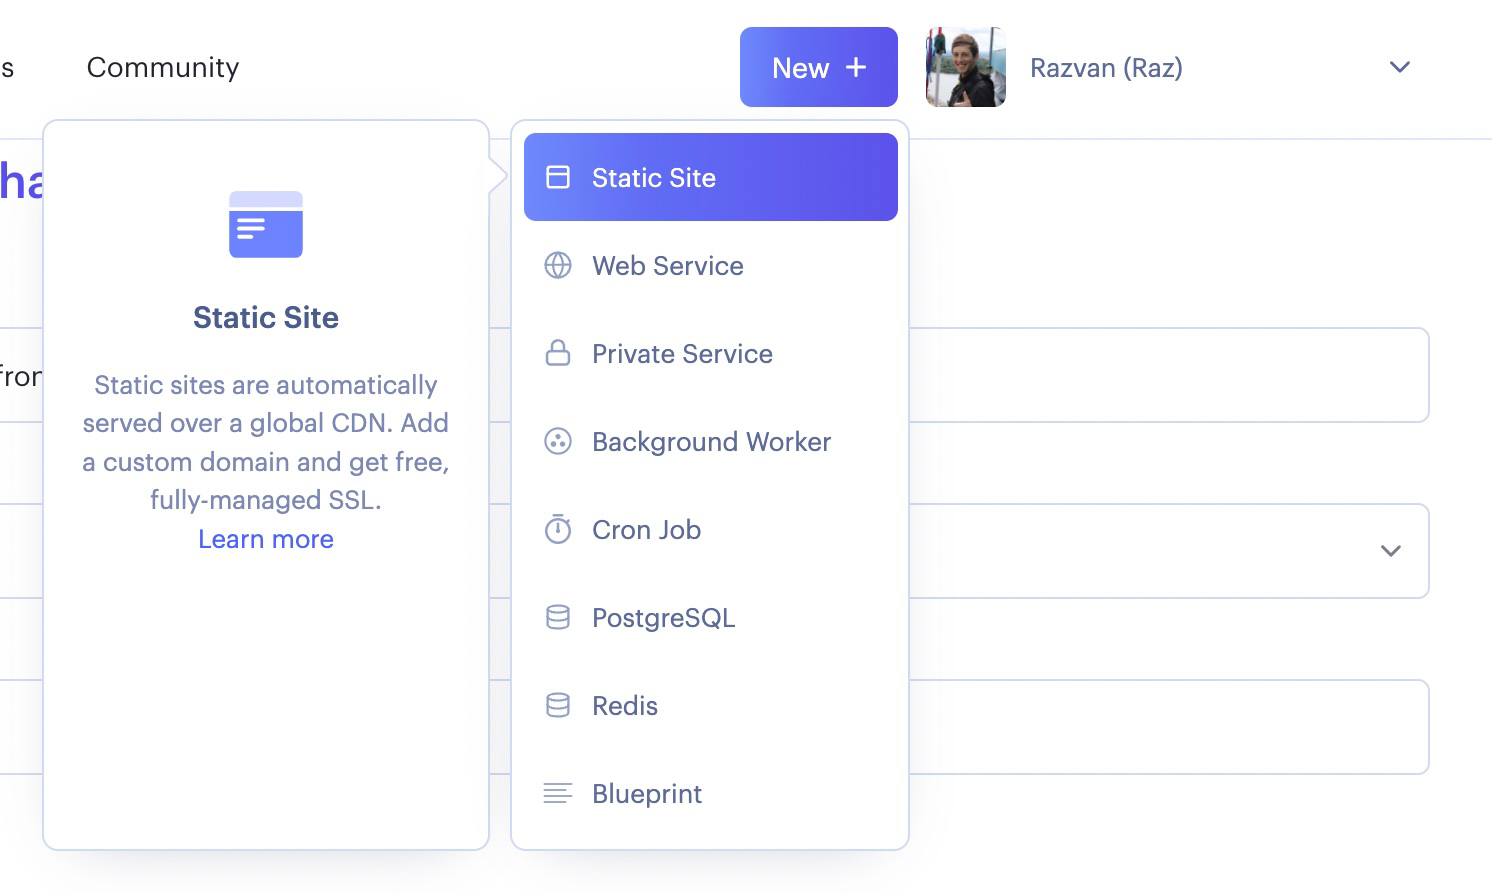
Back on your Render dashboard, click the New button at the top, and select Web Service from the dropdown list.
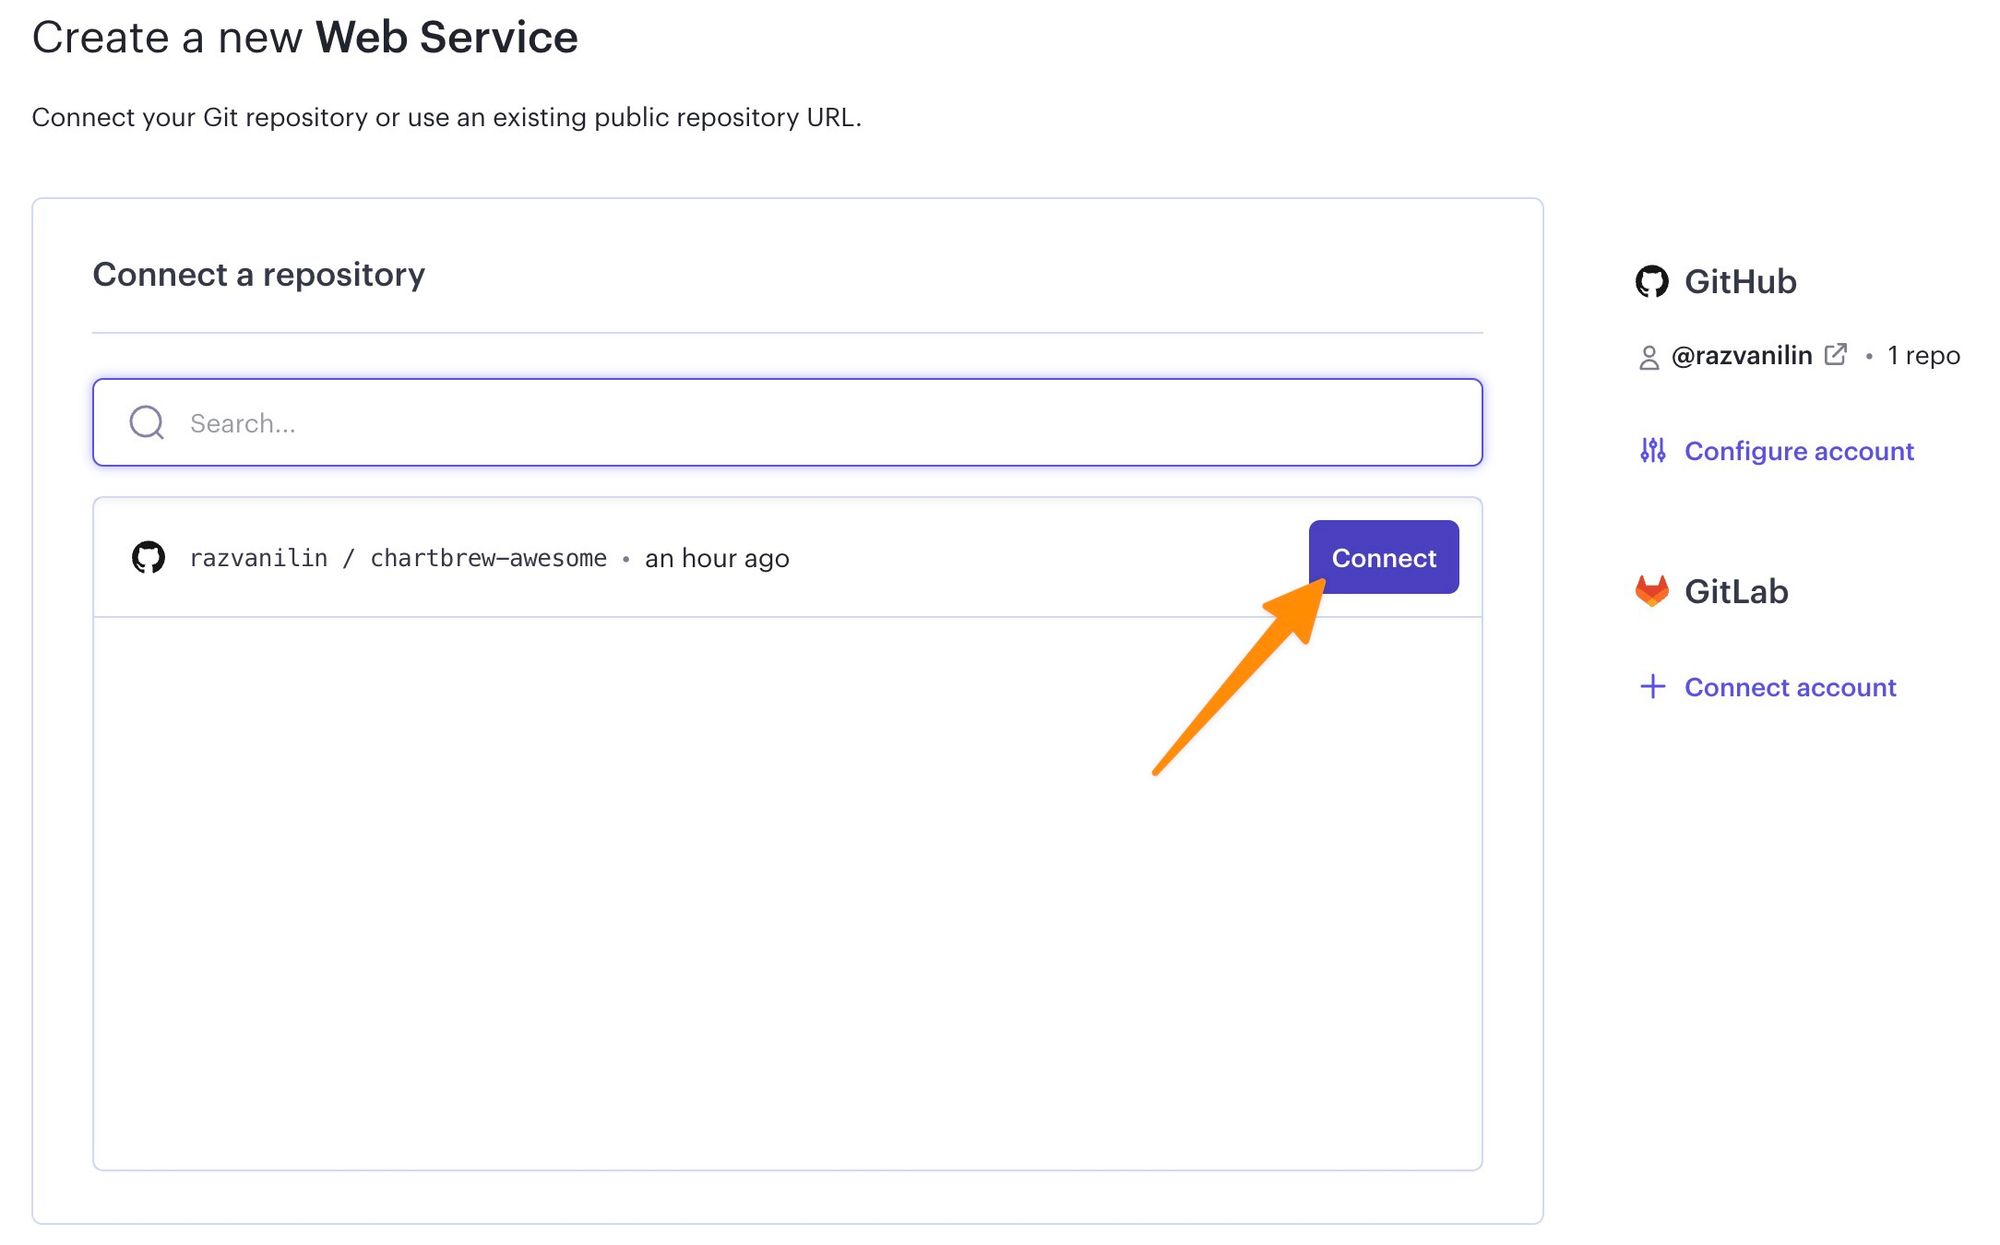
If you cannot see the newly forked project in the list, click to connect your GitHub or GitLab account or update your integration to allow access to your Chartbrew fork.
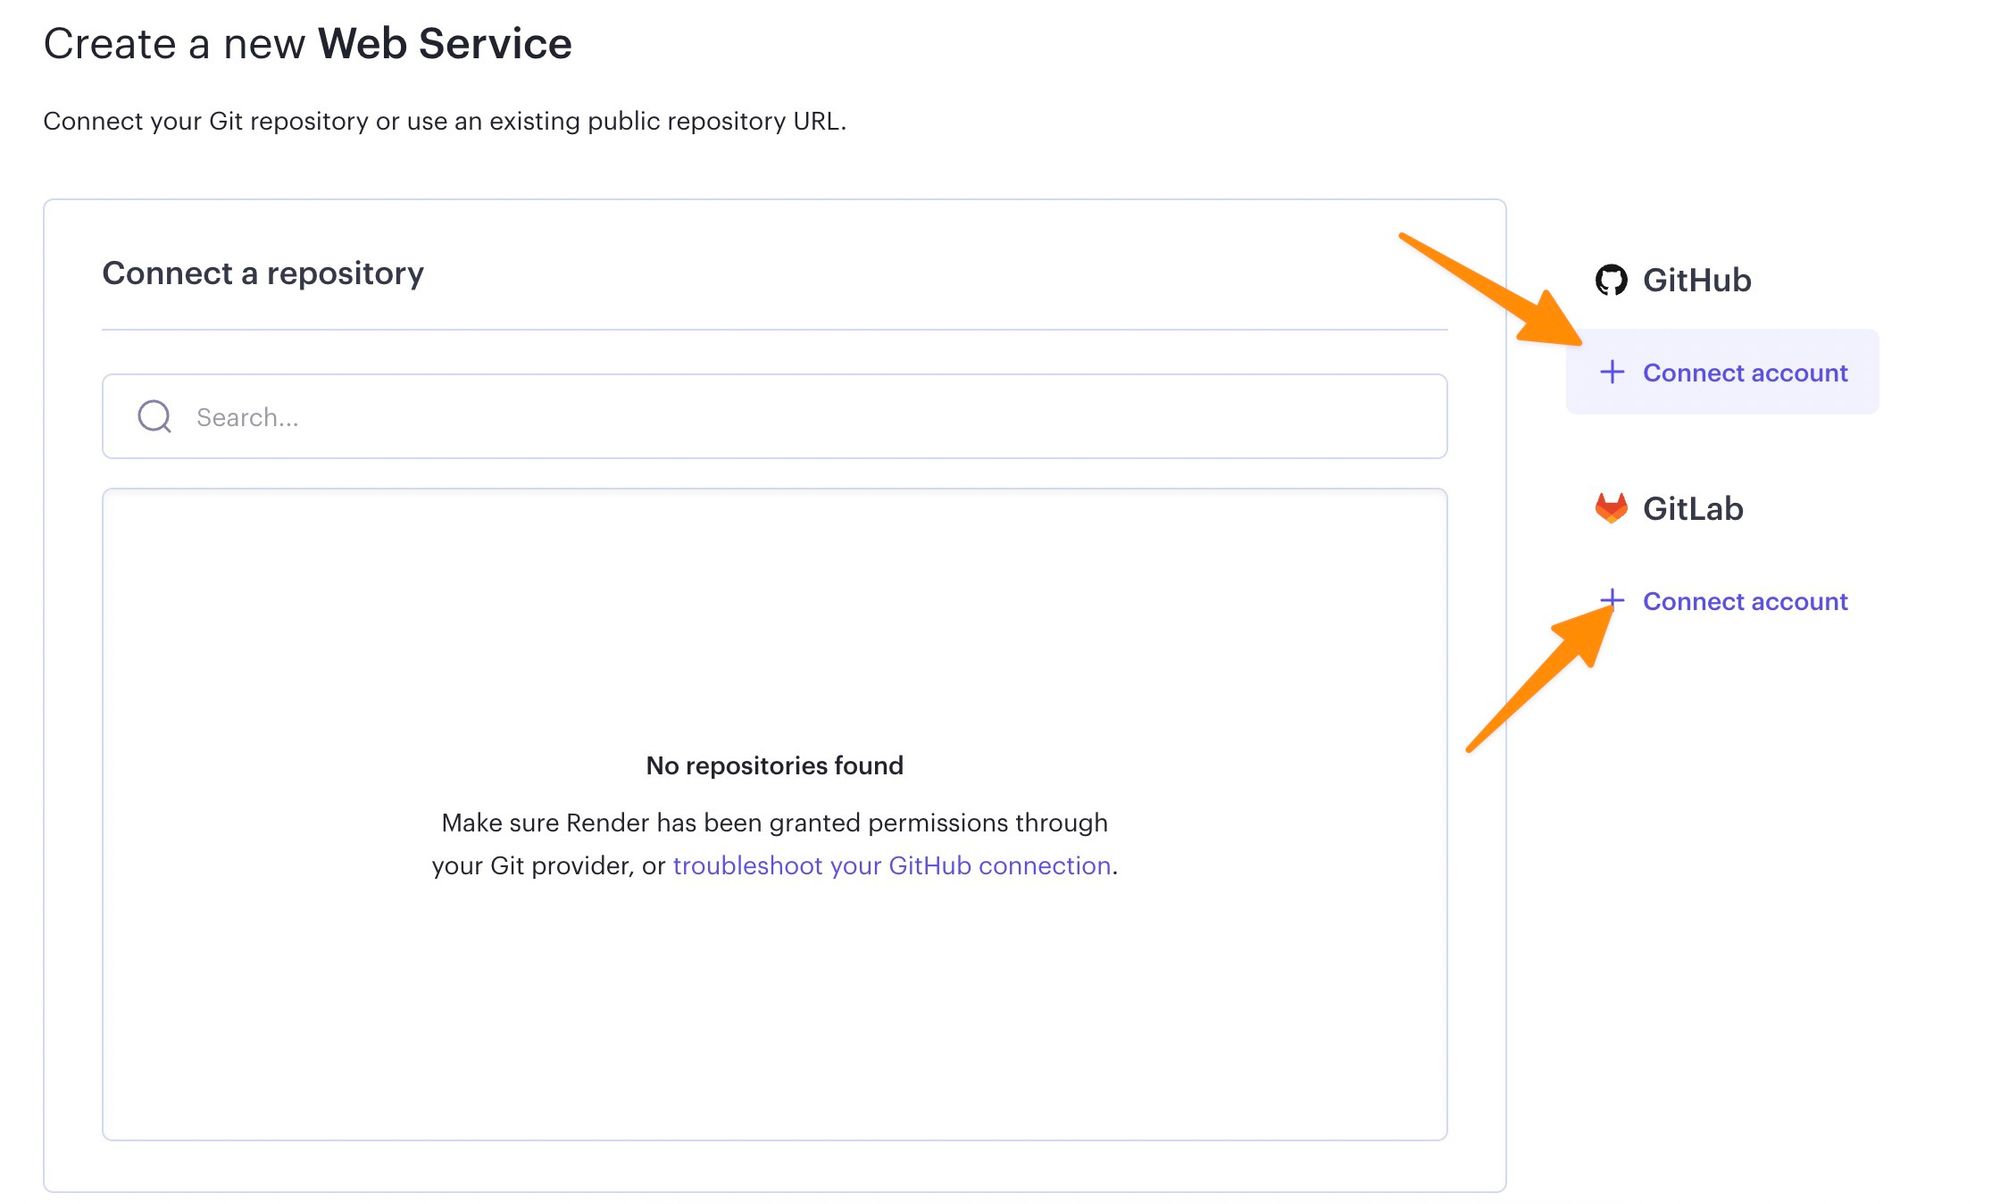
After connecting your account you should see the fork appearing in the list. Click the Connect button to proceed.
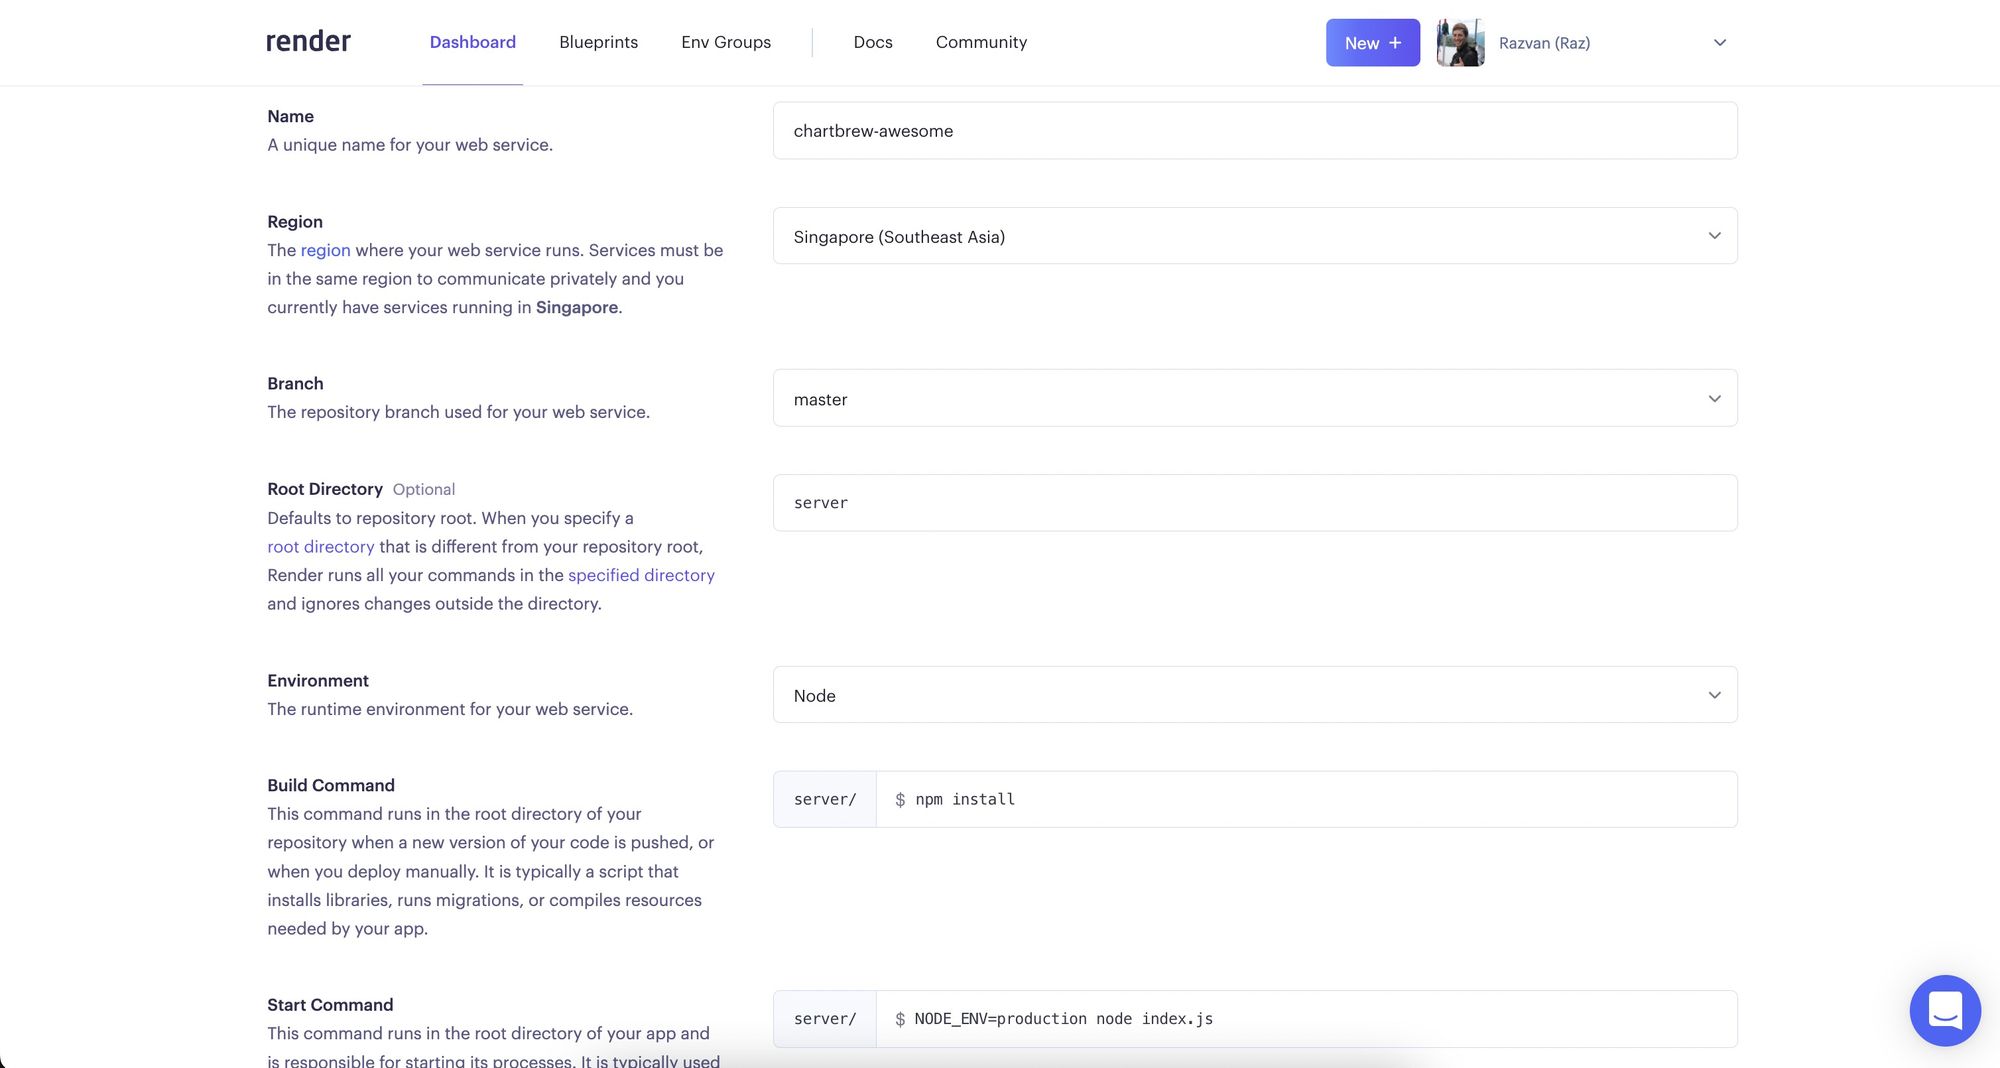
After you connect the repository, you will have to configure how the app runs. You can enter a name and a preferred region. For the rest of the options, copy the information below:
- Branch: master
- Root directory: server
- Environment: Node
- Build Command: npm install
- Start Command: NODE_ENV=production node index.js
Next, scroll down the page and click on the Advanced button. This will open a new section where we need to enter the environmental variables that Chartbrew needs to function correctly.
In this section, we will need the database details. If you created the database on Render, you can find your service in the dashboard. Click on the Postgres service and it will show all the required information there.
- CB_API_HOST - set this to 0.0.0.0 like in the example
- CB_DB_DIALECT - postgres
- CB_DB_PORT - 5432
- CB_DB_NAME - The name of the Chartbrew database
- CB_DB_USERNAME - The database user
- CB_DB_PASSWORD - The database user password
- CB_DB_HOST - The Hostname of your database
- CB_DB_SSL - set this to "require" as shown
- CB_ENCRYPTION_KEY - A 32-byte string used to encrypt sensitive data. You can generate one from here
You can also run the following command to generate a compatible encryption key:
node -e "console.log(require('crypto').randomBytes(32).toString('hex'))"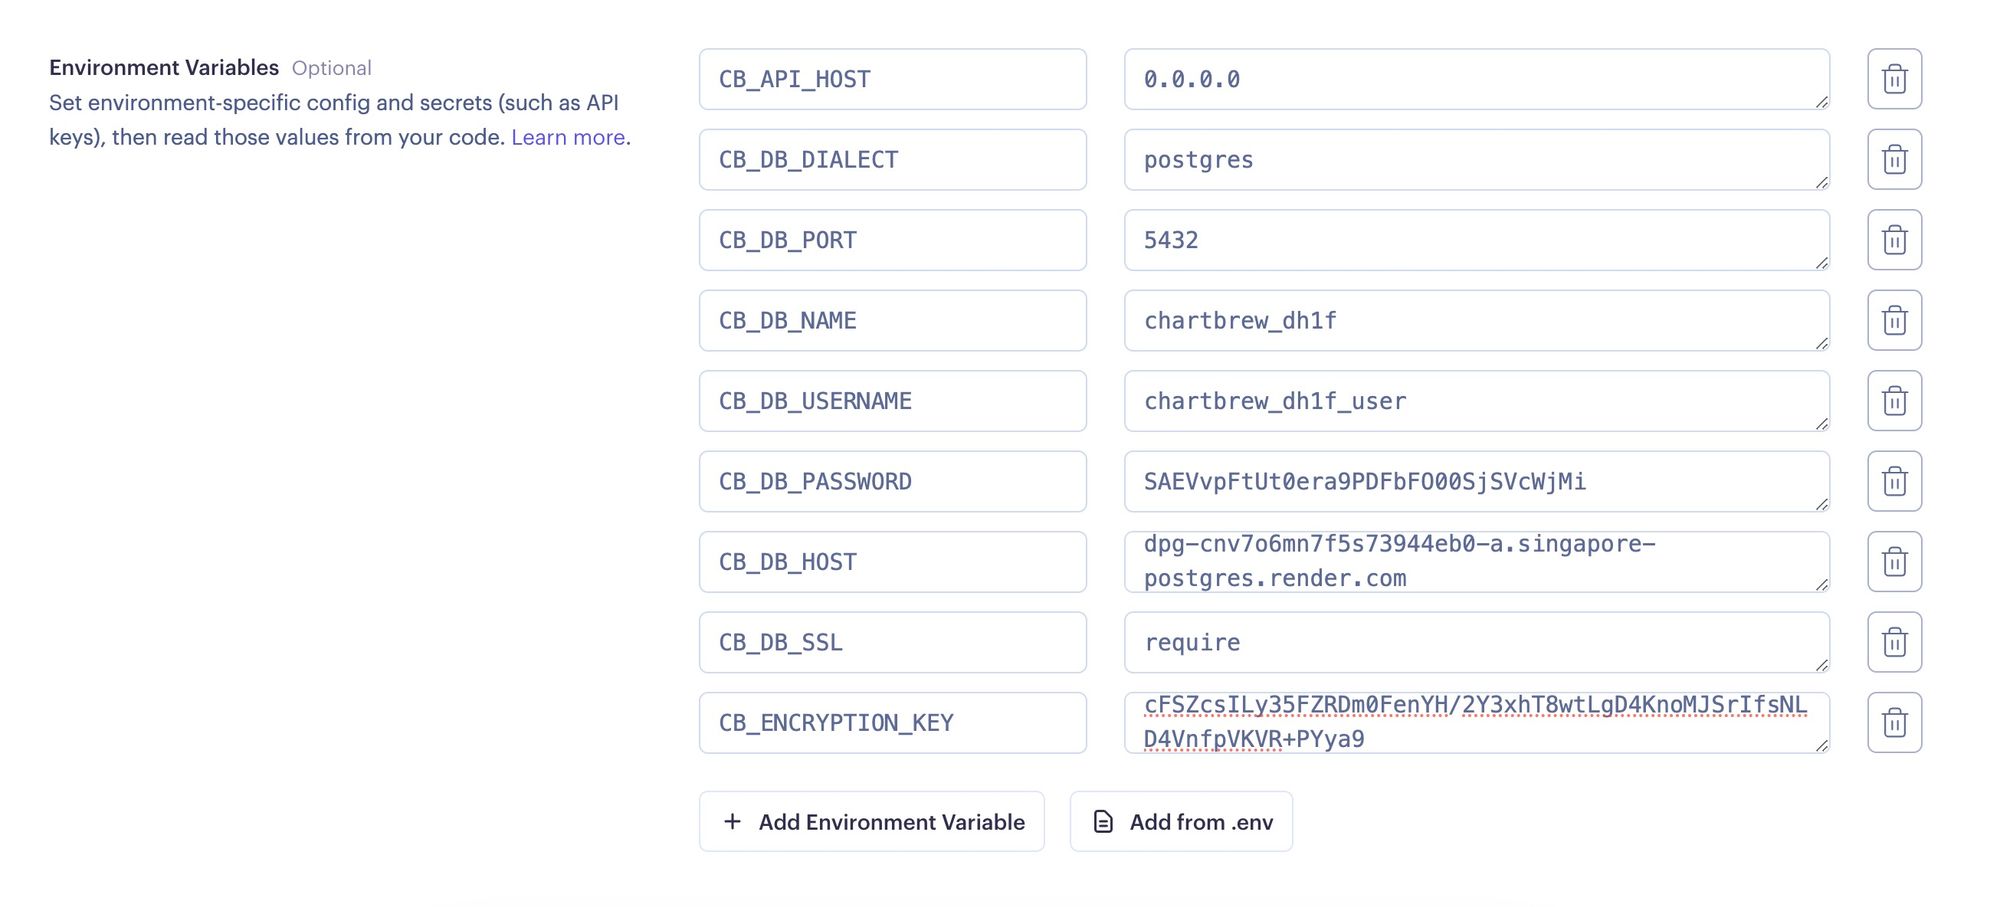
If you cannot find the full hostname, you can find it in the External Database URL string:
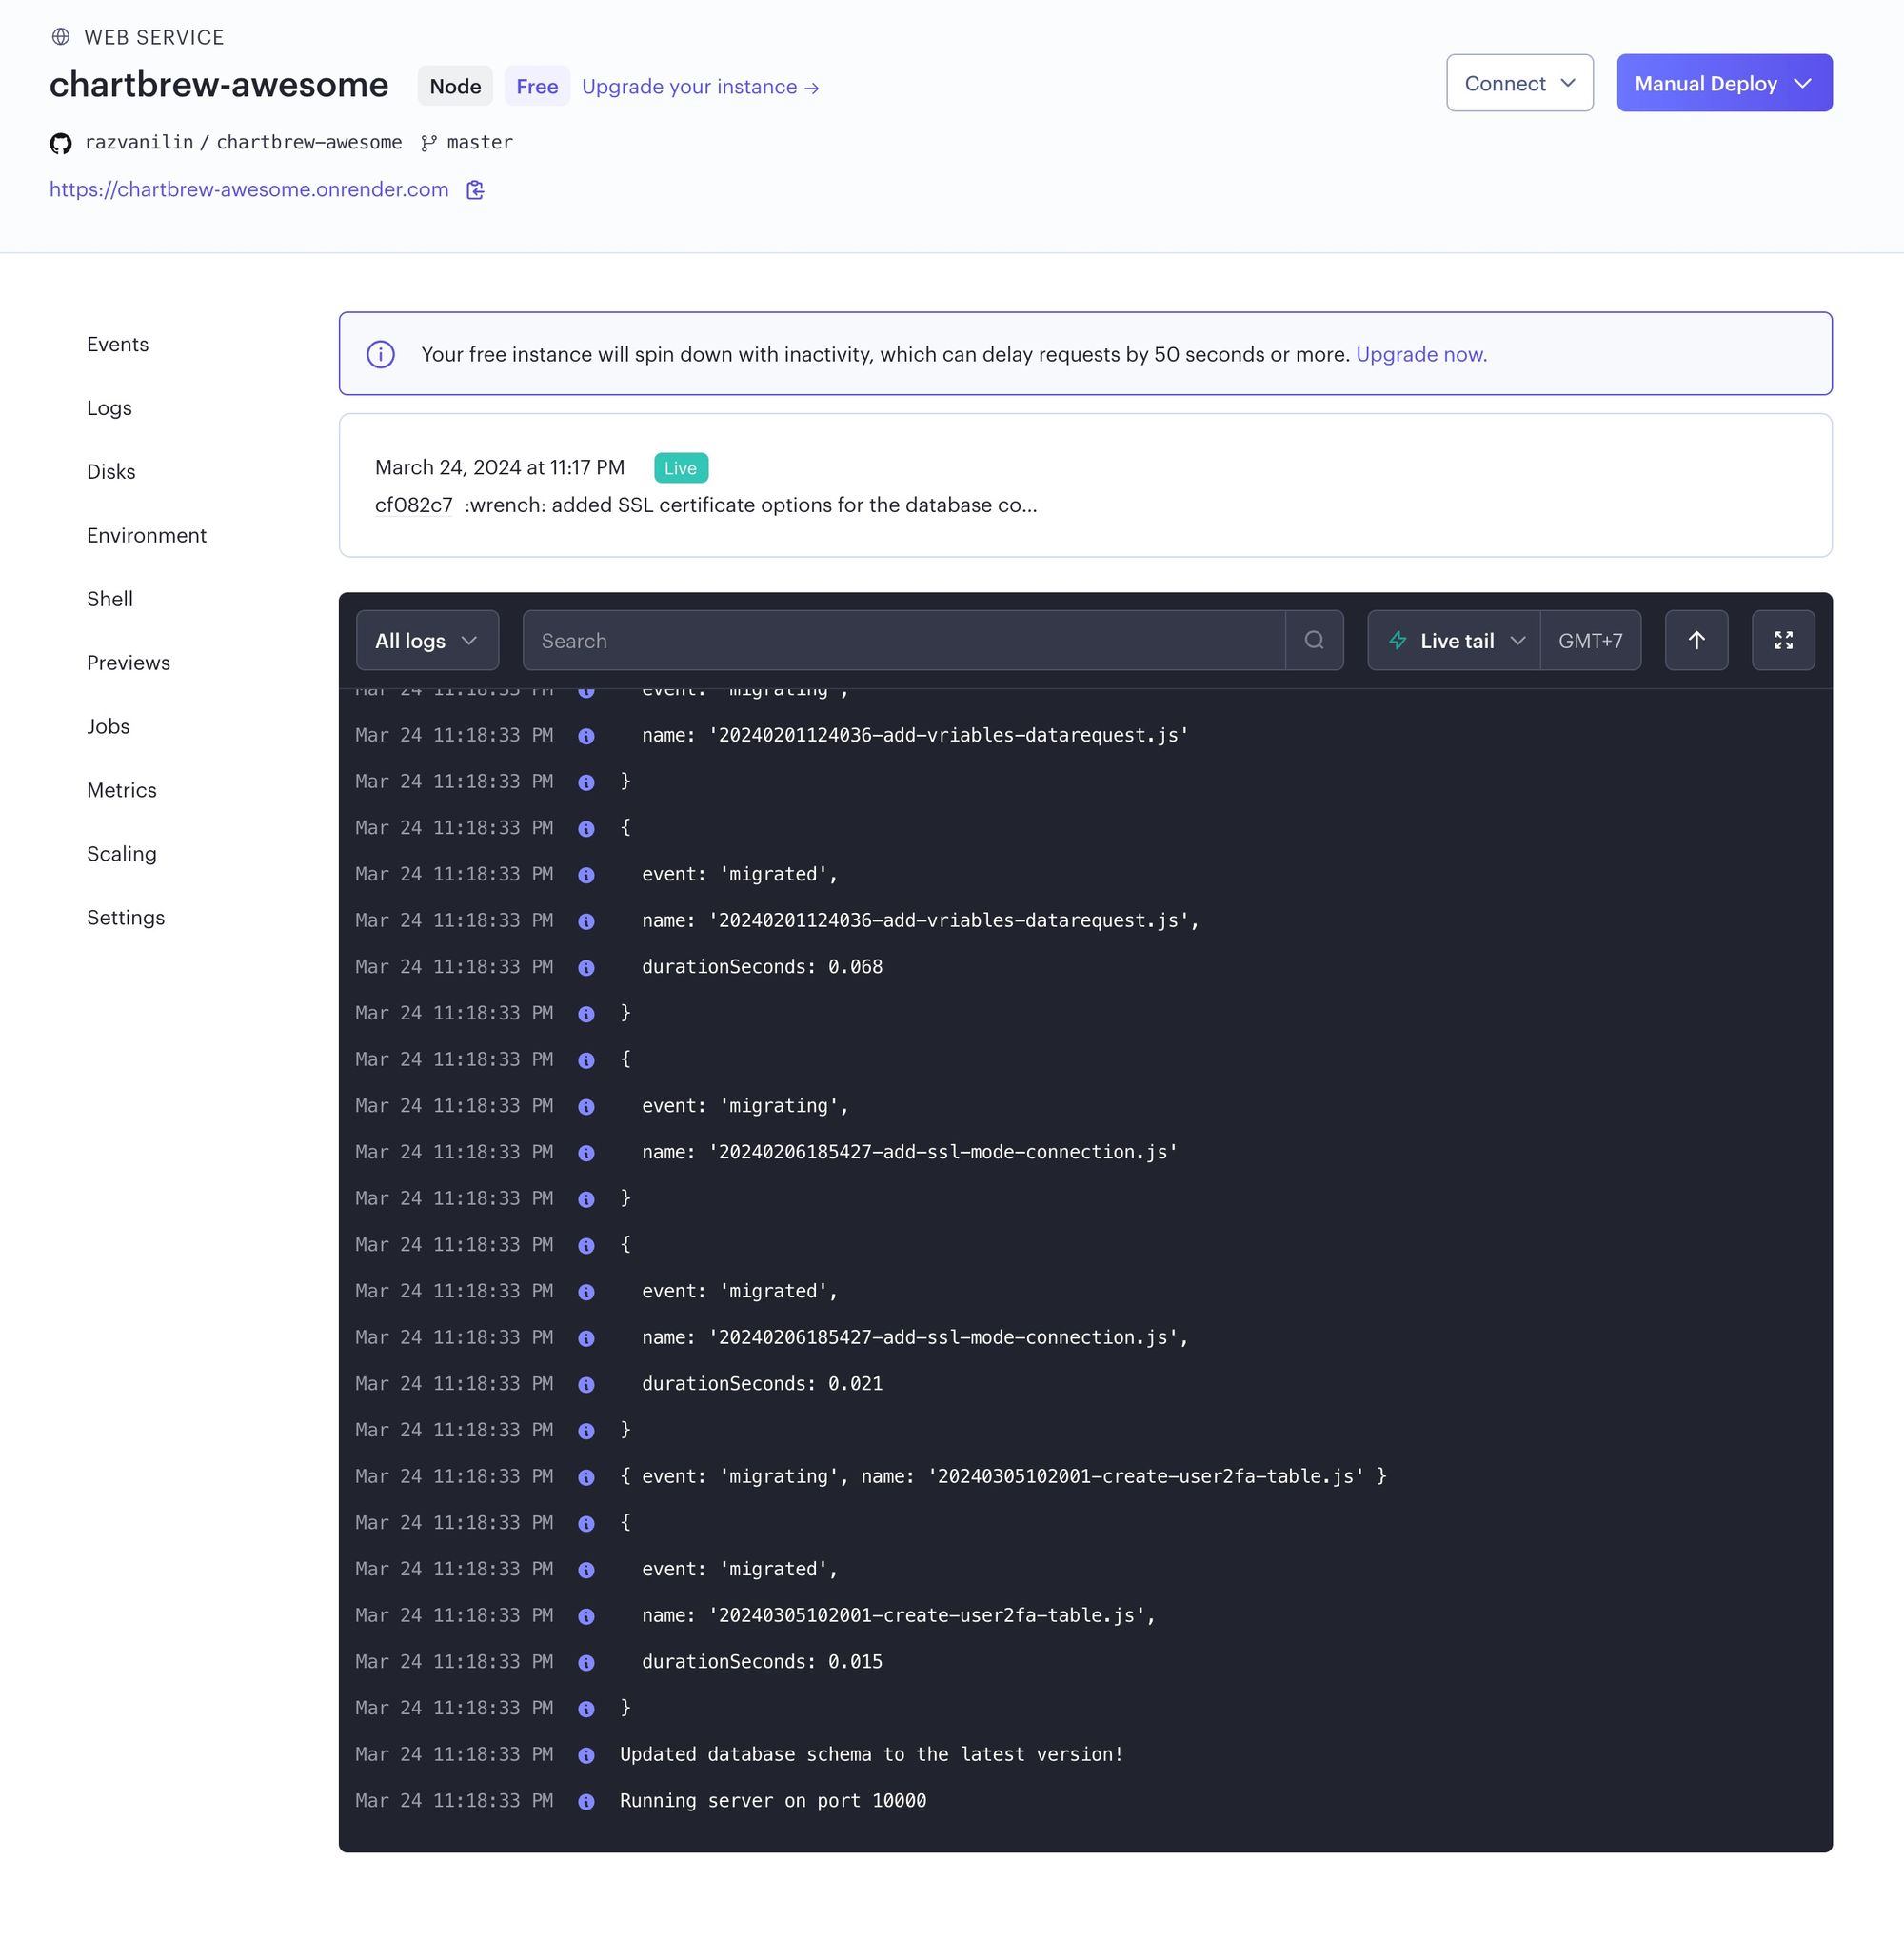
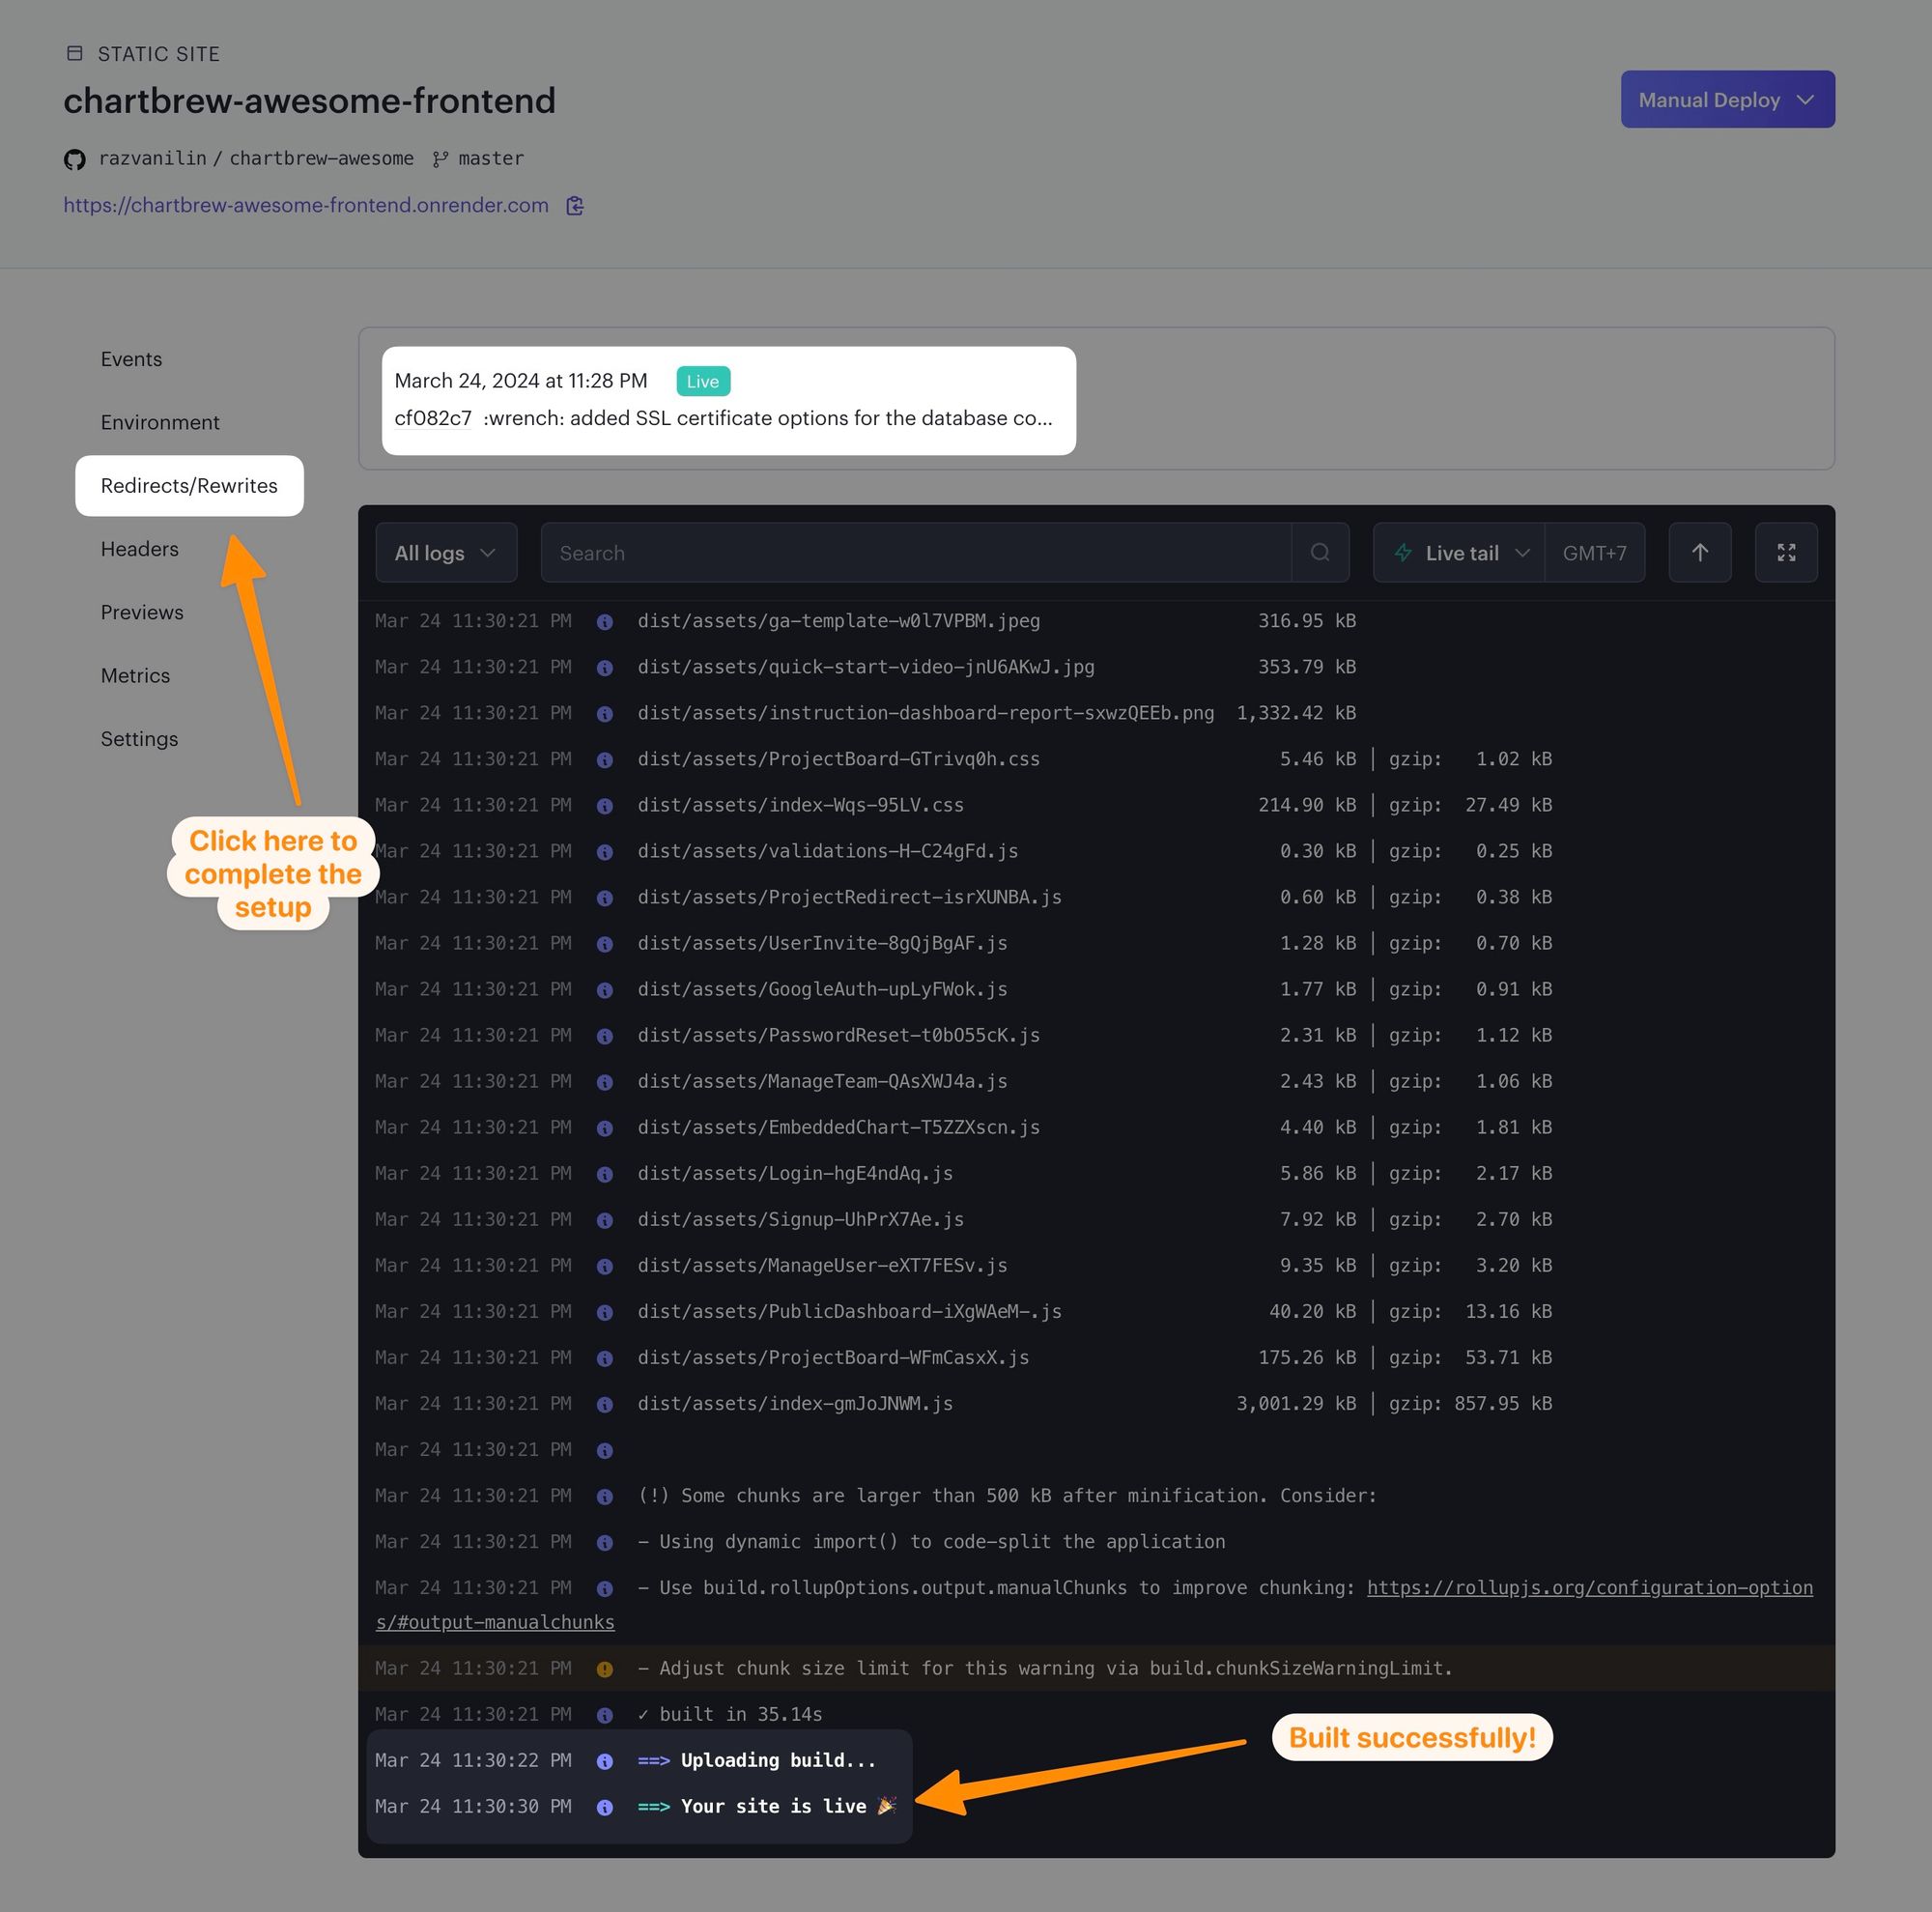
Now it's time to deploy the app! The build takes a few minutes if you are on the free plan. If everything worked, you should see that the server is running on an assigned port and that the database schema has been updated.
Deploy the Chartbrew front end on Render
If you noticed in the Chartbrew repository, there is a server folder for the backend and a client folder for the front end. We are going to use the client folder to build a static site on Render and connect it to the backend we just set up. Click to add a new Static Site to your Render dashboard.
Select the same repository from the list as before (your repository fork). On the next screen enter the information as shown below, then click Advanced to set up environmental variables.
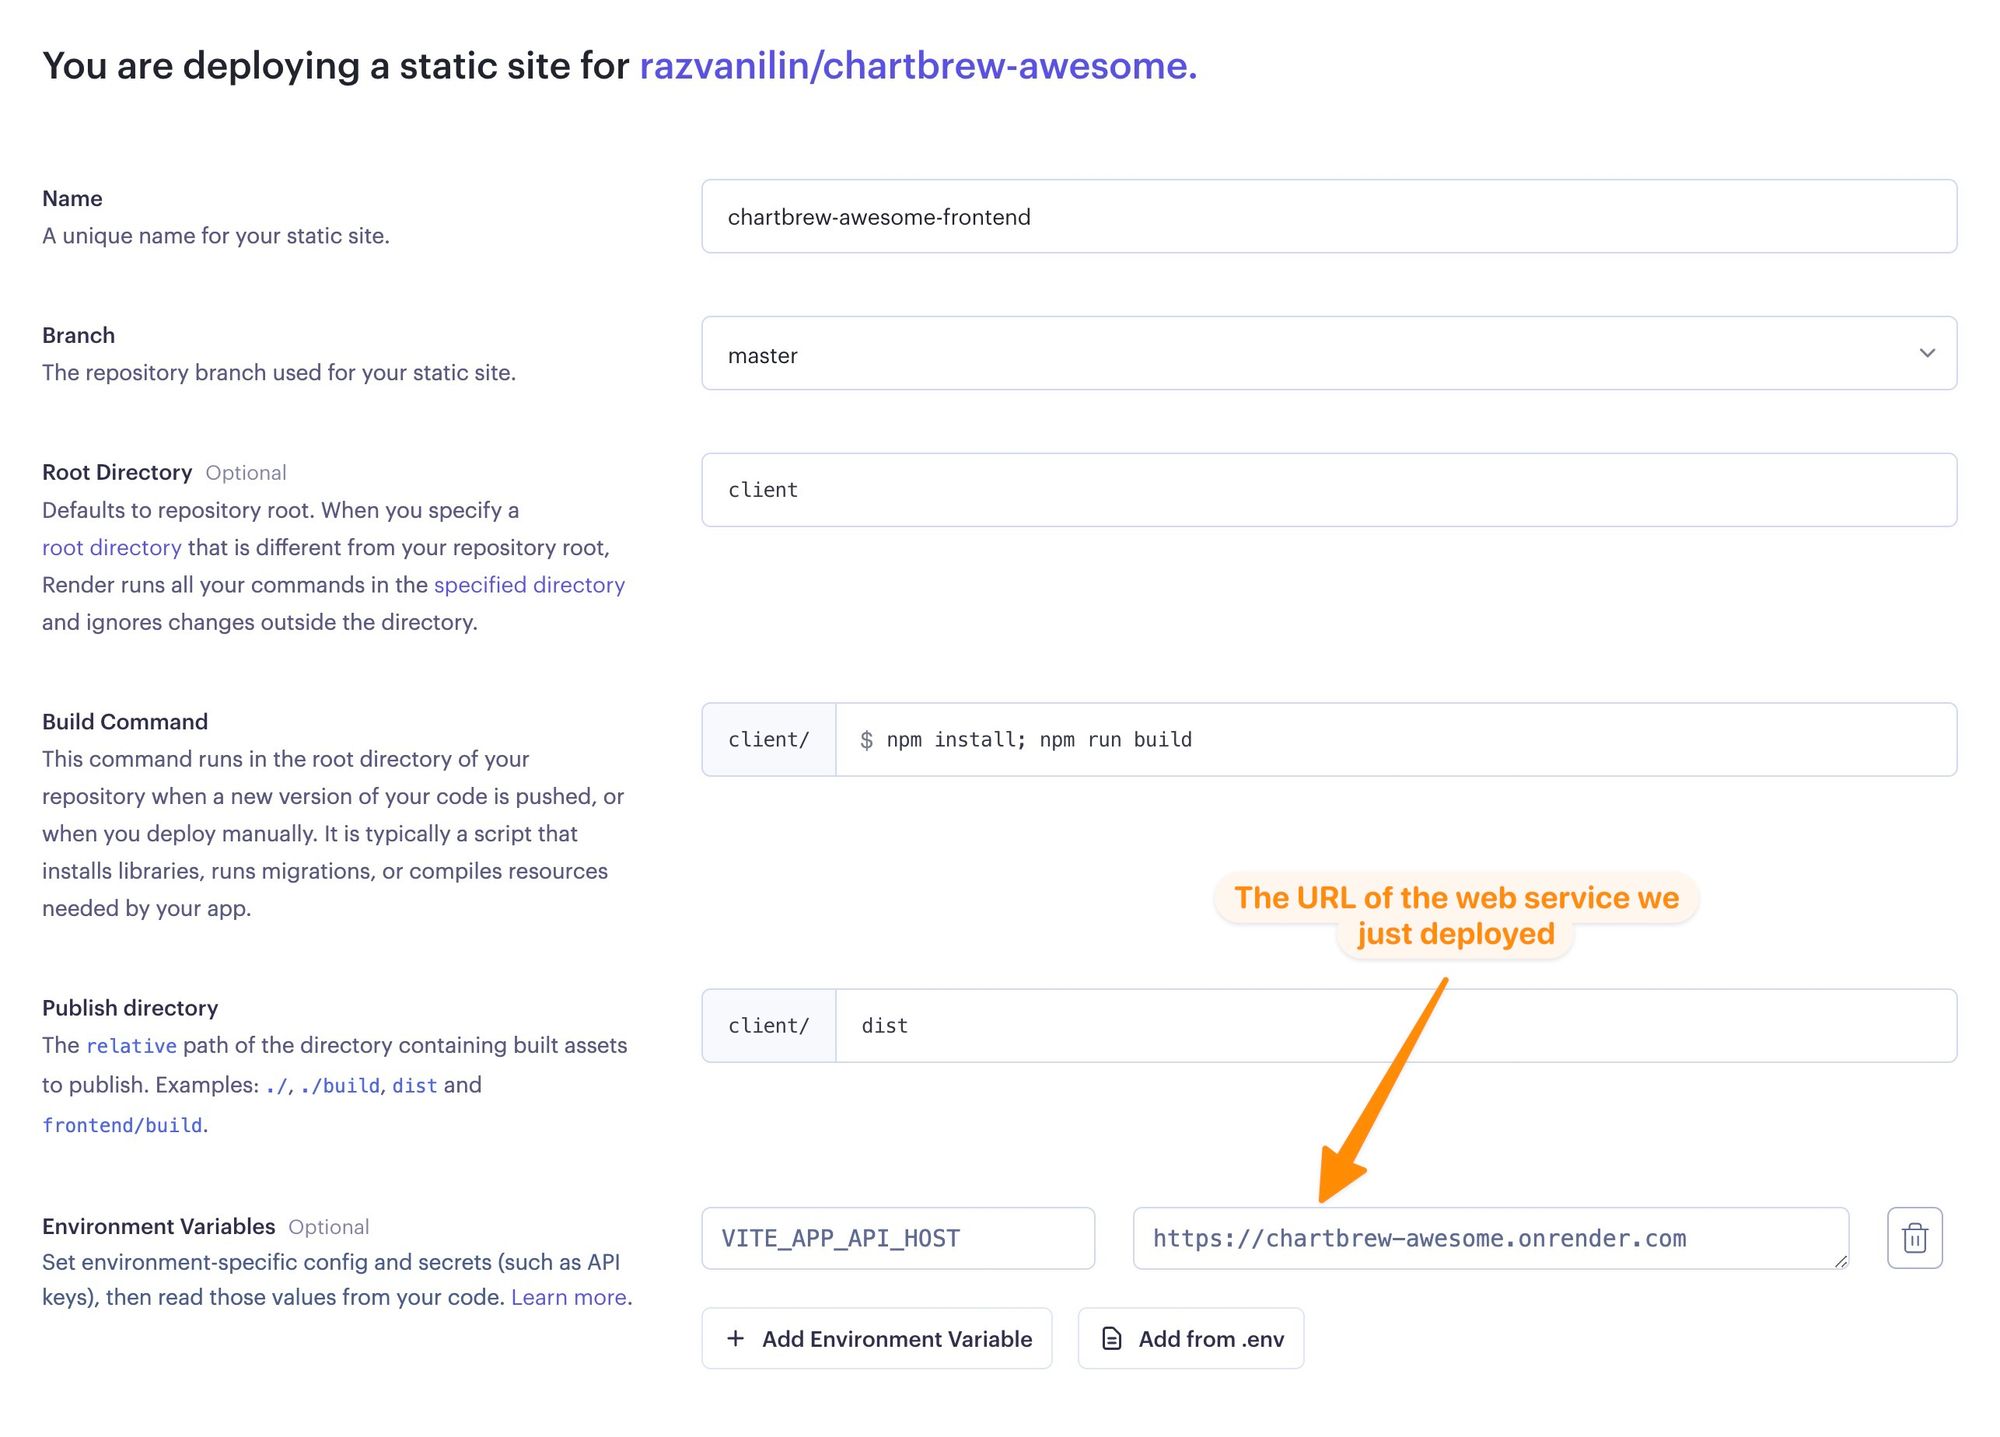
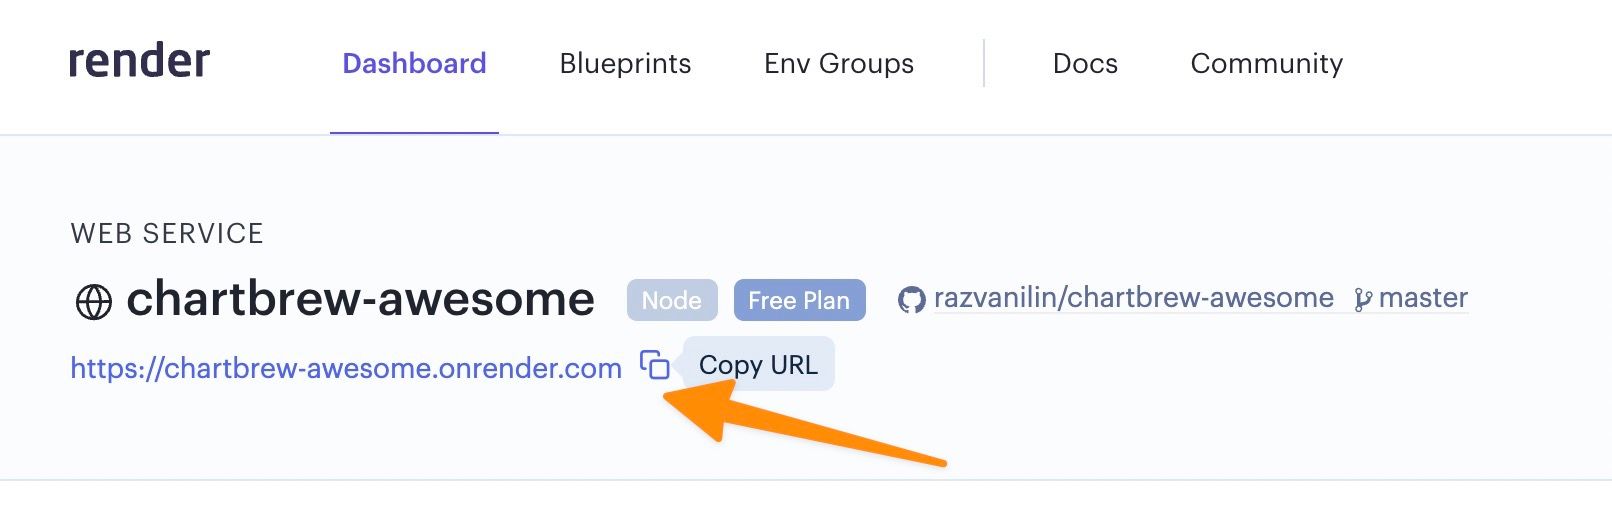
To successfully connect the front end to the back end service, we need to set up an environment variable to tell the address of the web service. To get the URL of your back-end service, access your web service that was set up in the previous step, and you will see the URL at the top of the page.
After creating the static site, you will need to wait a few minutes for the deployment after which some extra rewrite rules need to be put in place for the application to work.
Add the following rule on the Redirects/Rewrites page and save the changes:
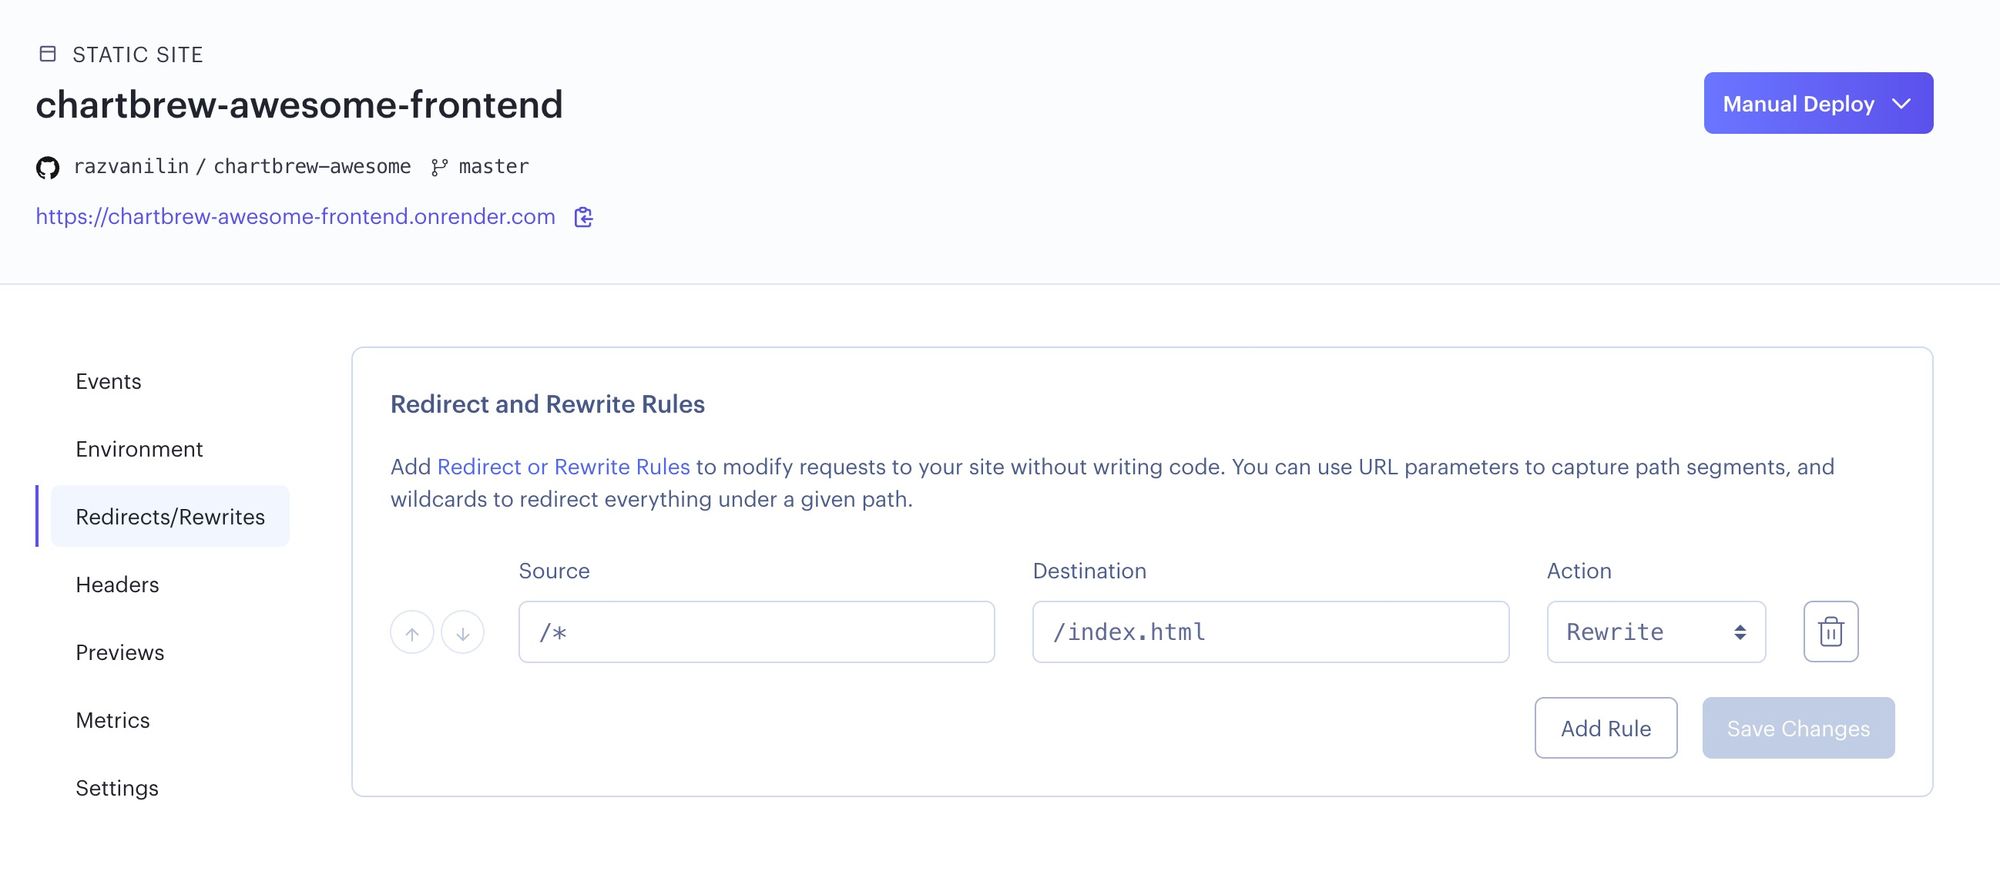
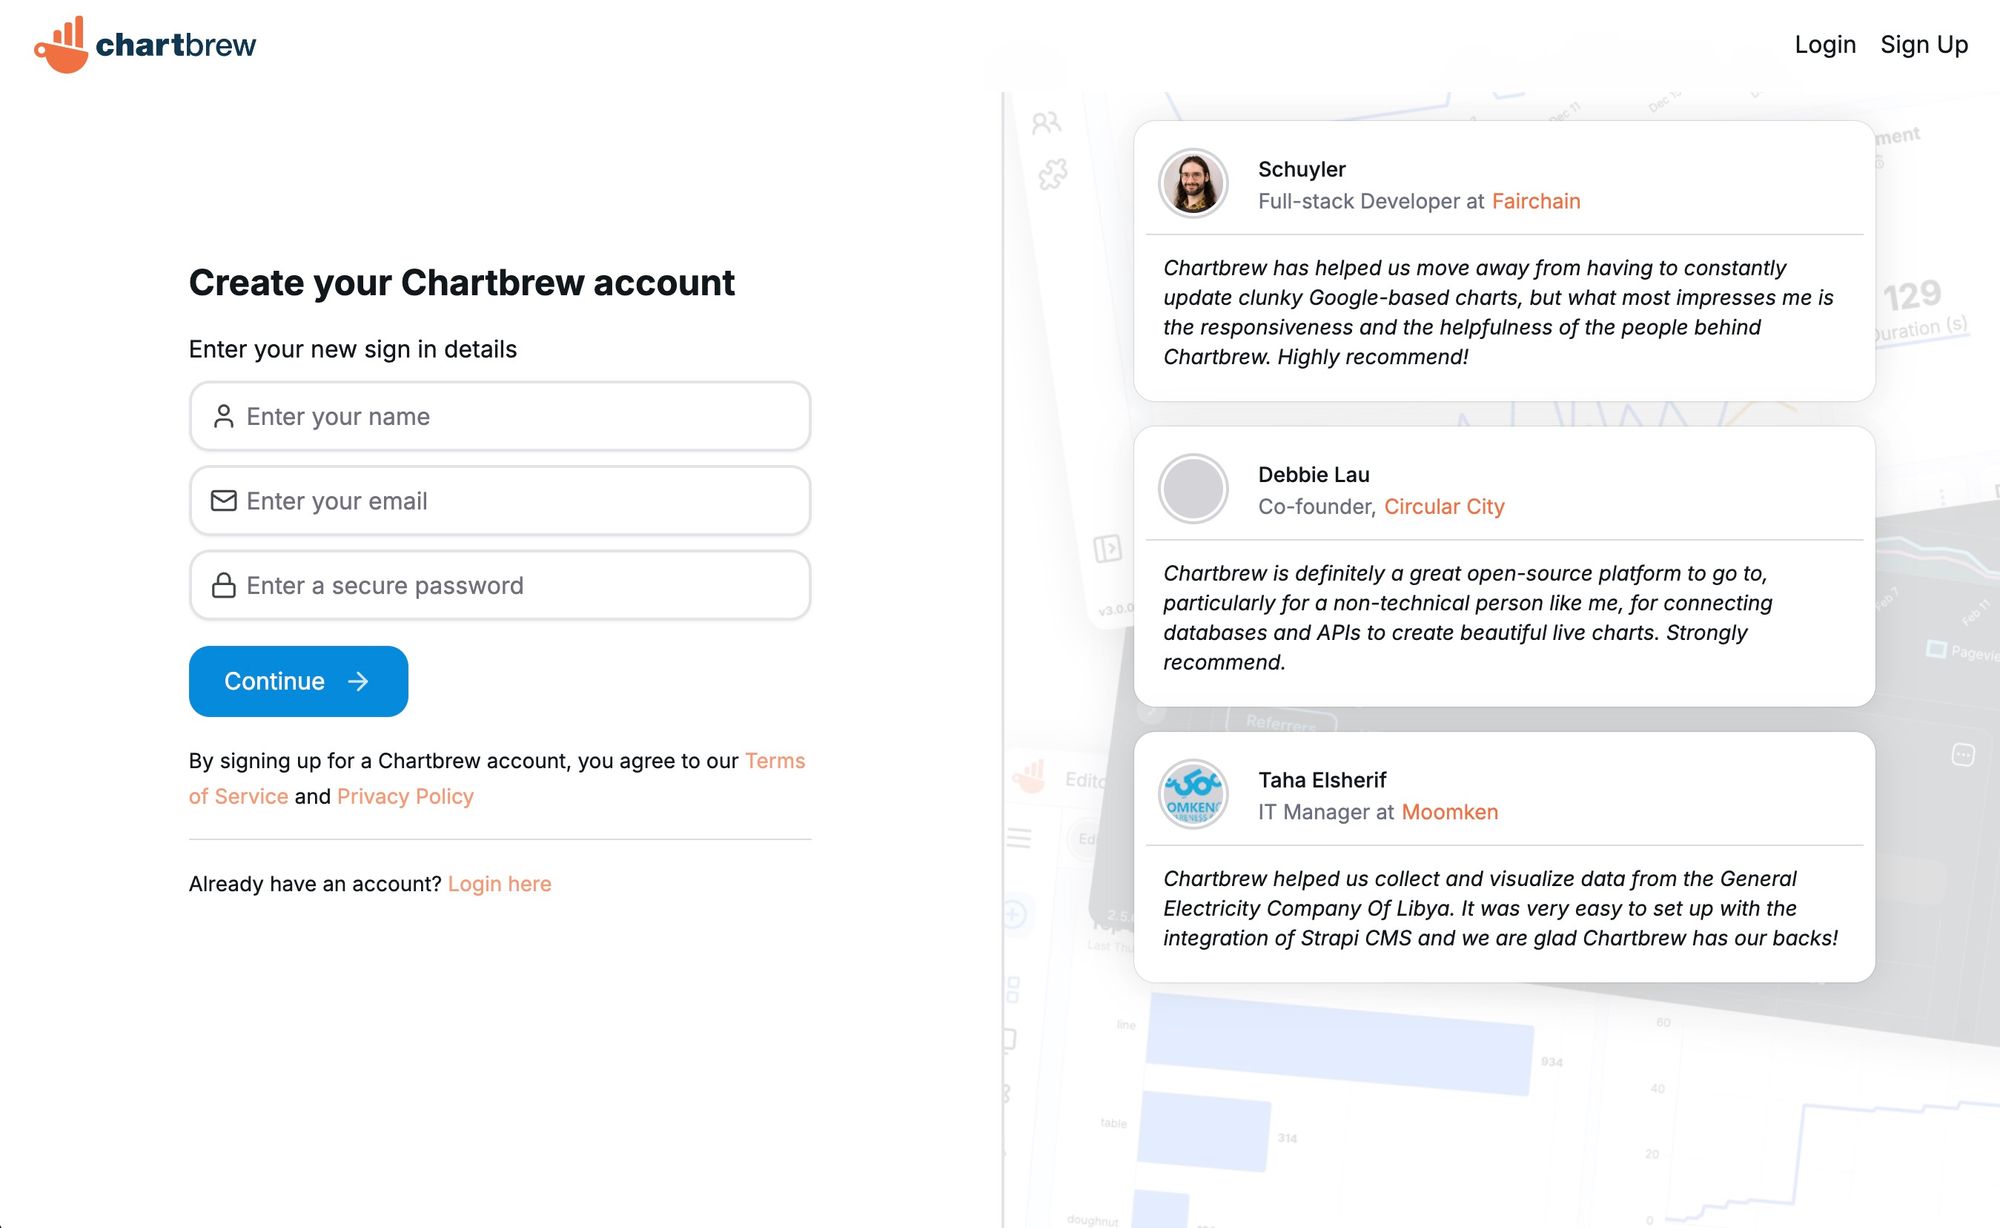
If everything worked, you can access the URL at the top and you should be redirected to the Signup page in Chartbrew.
Final touches
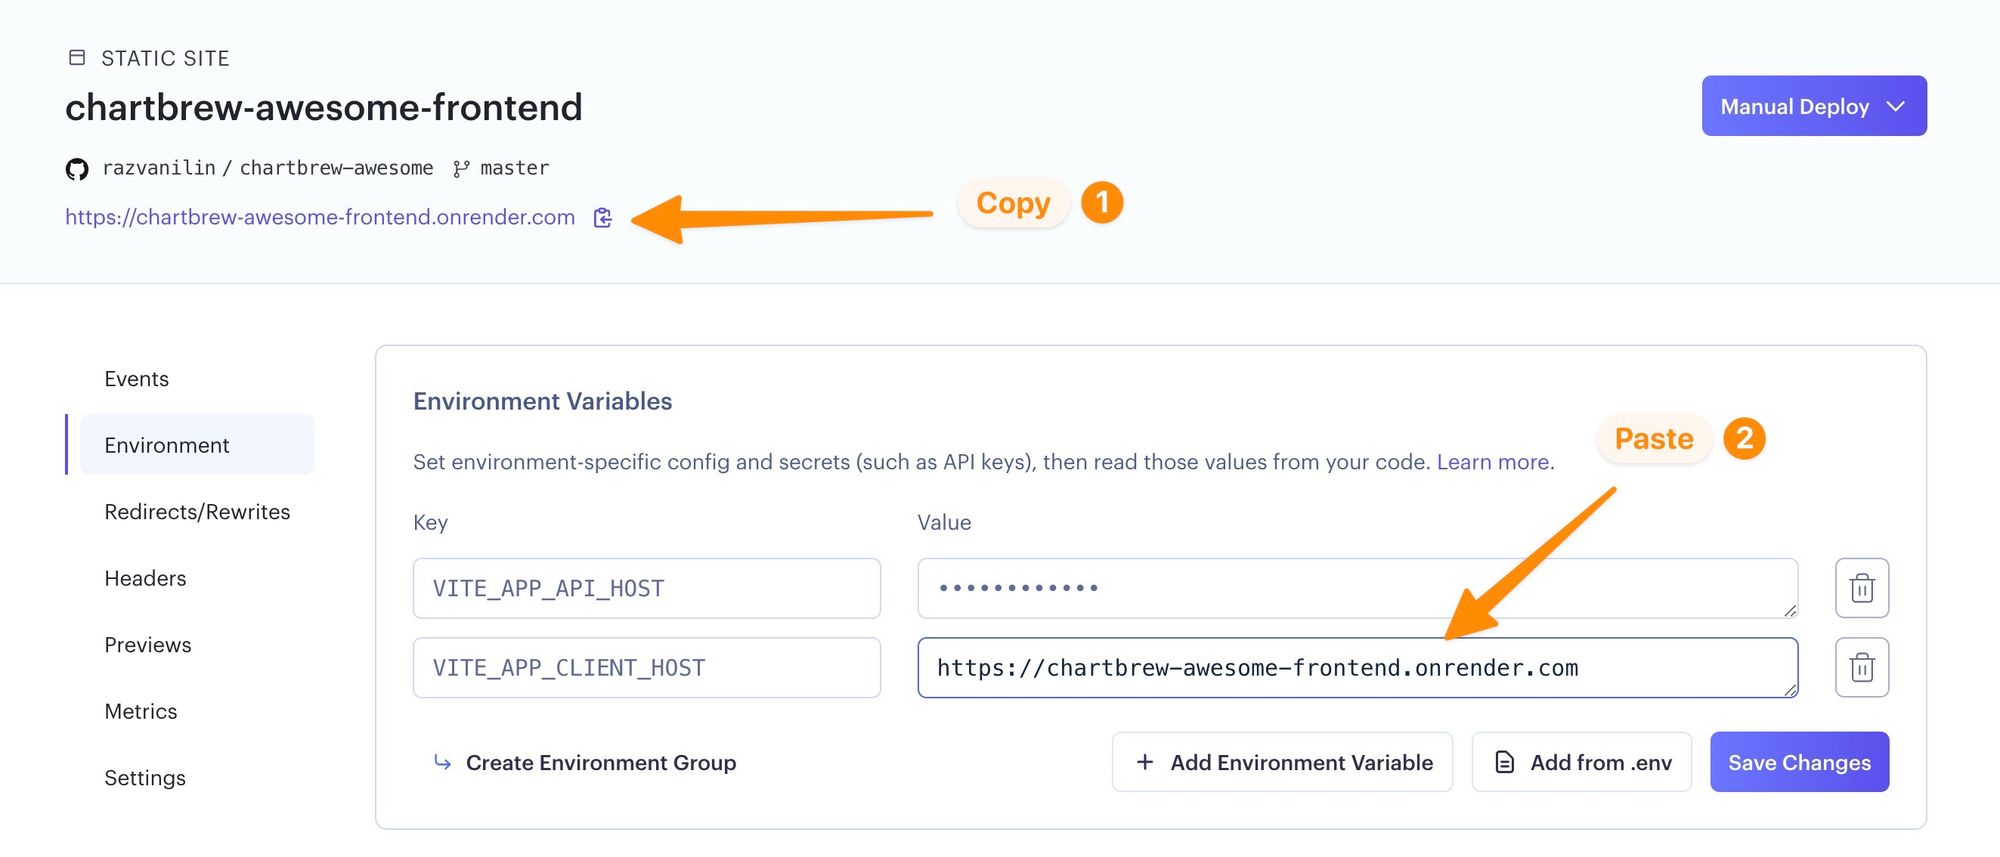
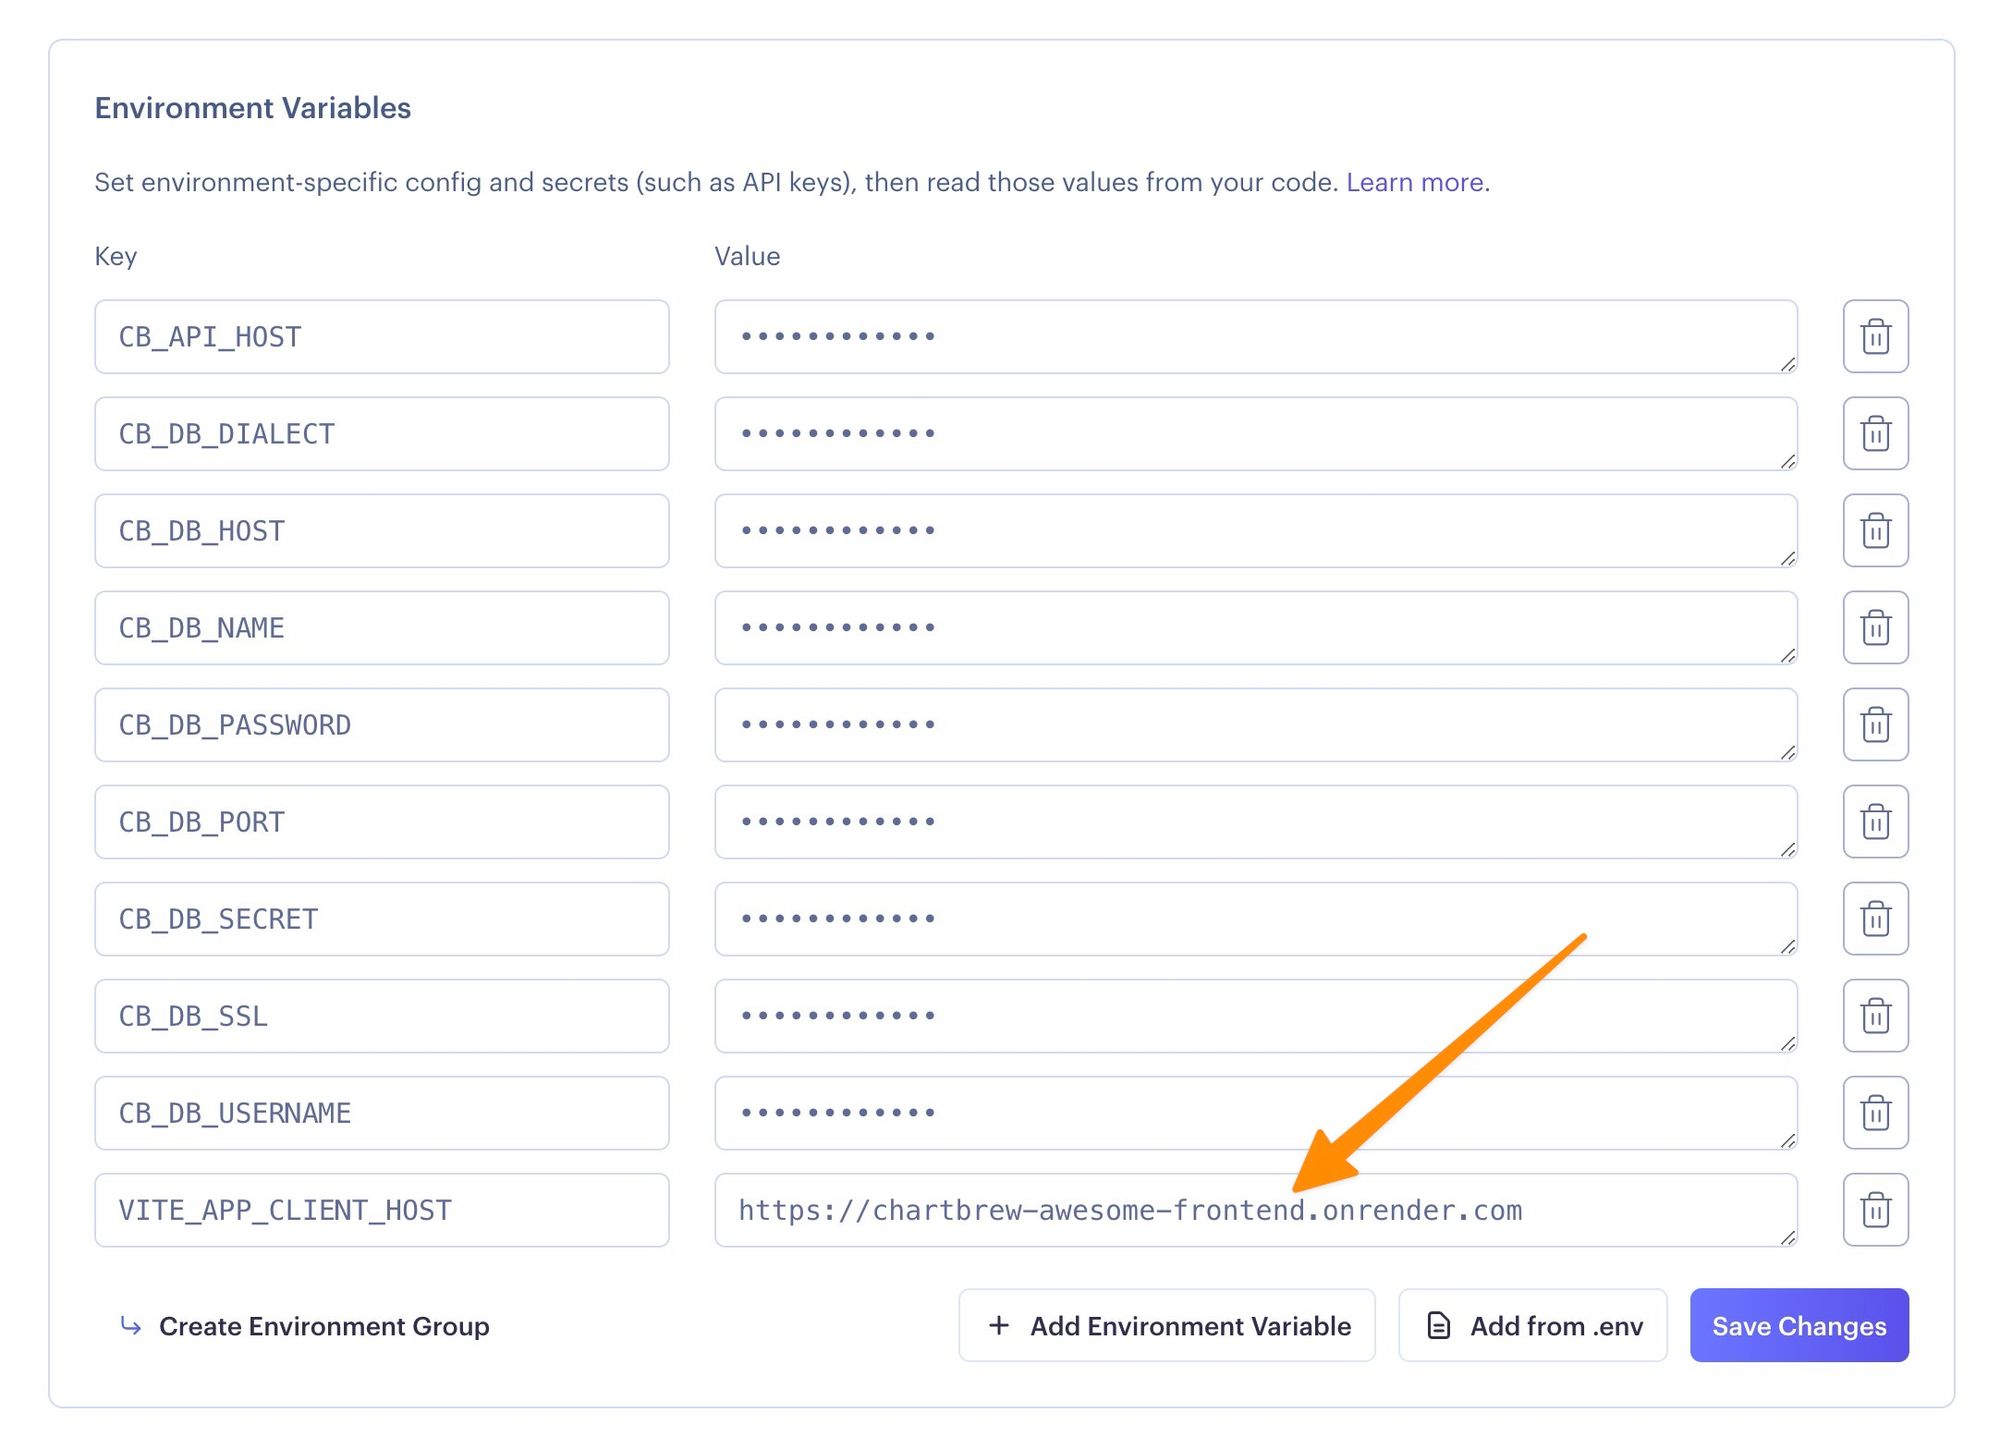
The application's main functionality is up and running now, but to make sure all the features work properly, we need to tell the back-end and front-end about the exact address of the static site. To do this, we need to add a new environment variable to both the back-end and front-end services.
In this example, the front-end URL is https://chartbrew-frontend.onrender.com
For the front end, click on the environment menu option and add the VITE_APP_CLIENT_HOST variable.
Add the same variable with the same value on the back-end web service too:
Alternatively, deploy the front end on Vercel
If you wish to deploy the front-end application on Vercel instead, you can follow the tutorial here:
Razvan IlinNext steps
Now that you have a working Chartbrew application, you can explore the full list of tutorials to see how you can connect your data sources and visualize your data.
If you prefer to use Chartbrew as a service without setting up the platform yourself, you can do so at chartbrew.com and can start with a 30-day trial.
Let us know how you get on by joining our Discord community:
