
Automated snapshots let Chartbrew email or post a high‑resolution image of any dashboard on a schedule you control. They are perfect for client reporting, weekly KPI digests, and stakeholder updates because they keep everyone aligned without you logging in or exporting files by hand.
TL,DR: Set it, style it, add recipients, and Chartbrew handles the rest using the same reliable job queue that powers export and alert features.
Why automated snapshots matter
- Save time by replacing manual exports with a set‑and‑forget workflow.
- Increase engagement, reports arrive where people already work, like inboxes or Slack channels.
- Consistent branding thanks to theme, header, and viewport controls.
In this guide, you'll learn how automated snapshots keep everyone up to date without manual exports and how to configure them in just a few clicks.
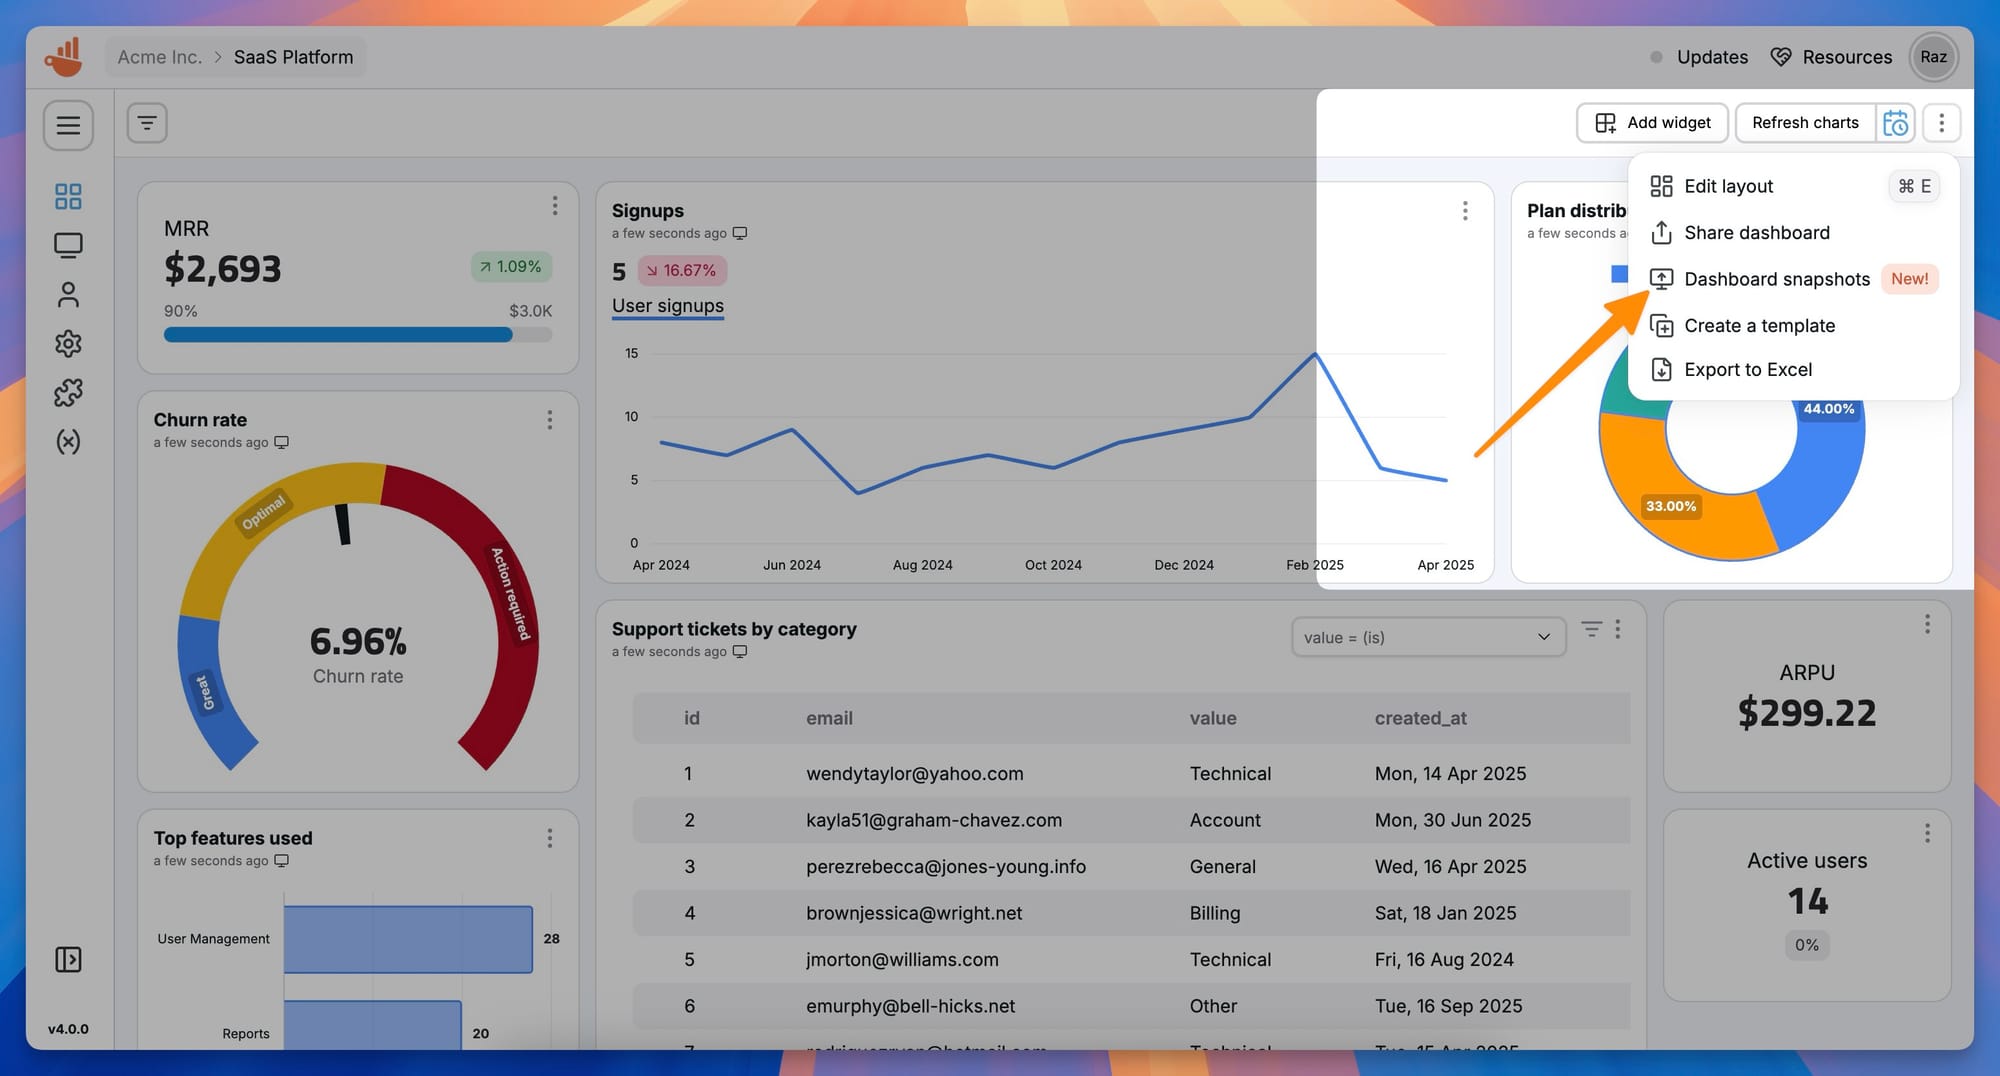
1. Open the snapshot settings
- Navigate to the dashboard you want to share
- Click the settings icon in the upper corner, then choose Dashboard snapshots.
- A new modal opens with a live preview so you can see how your snapshot looks like
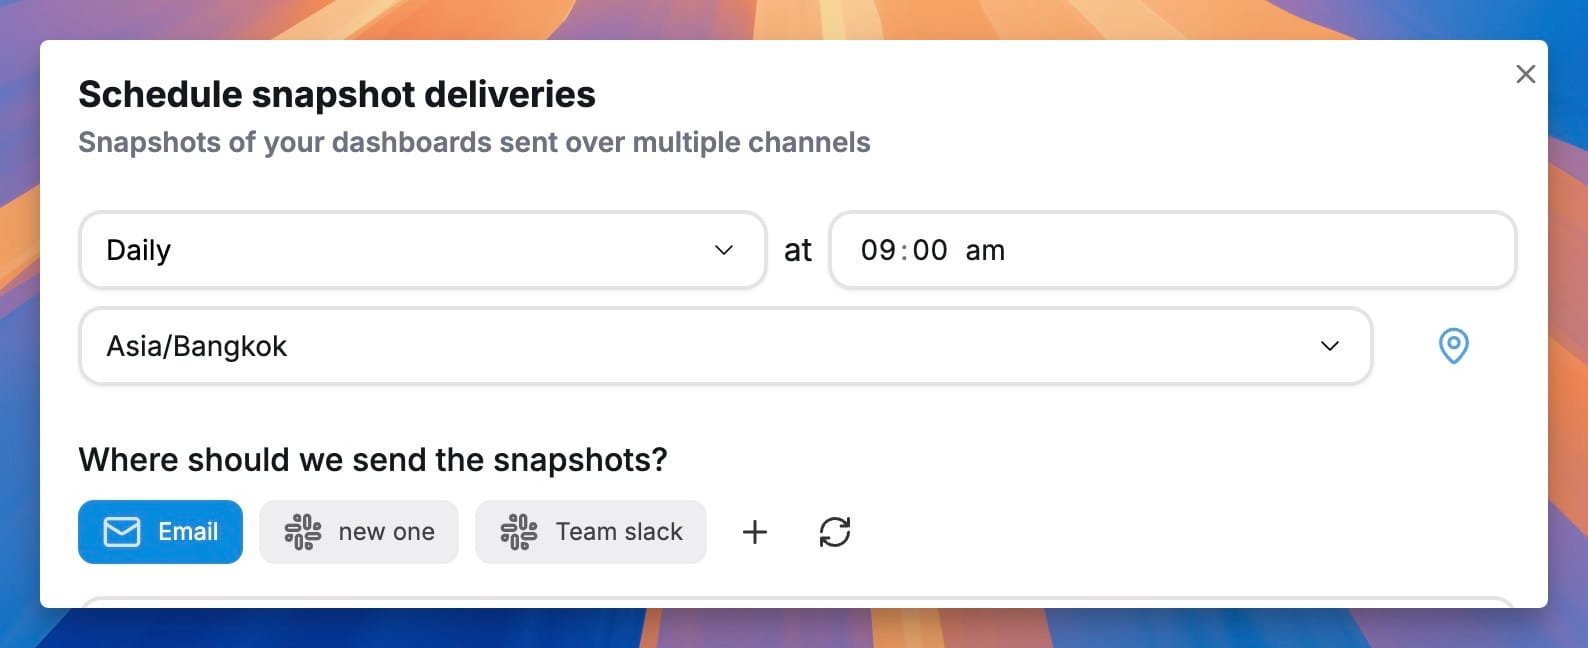
2. Pick a schedule
Chartbrew makes scheduling simple with presets that cover 99 % of use‑cases and a timezone picker so the job fires exactly when you expect.
| Option | Best for | Notes |
|---|---|---|
| Daily | Morning executive summary | Fires once every calendar day at the chosen hour |
| Weekly | Monday pulse report | Select the weekday and time |
| Every X days | Bi‑weekly or quarterly digests | Choose an interval (e.g., every 14 days) |
| Every X hours | Near‑real‑time ops metrics | Minimum 1‑hour interval |
| Every X minutes | High‑frequency monitoring | Minimum 1-minute intervals |
👉 Timezone aware: Pick any timezone from the dropdown. The backend stores your choice and converts it so snapshots trigger at the right local time.
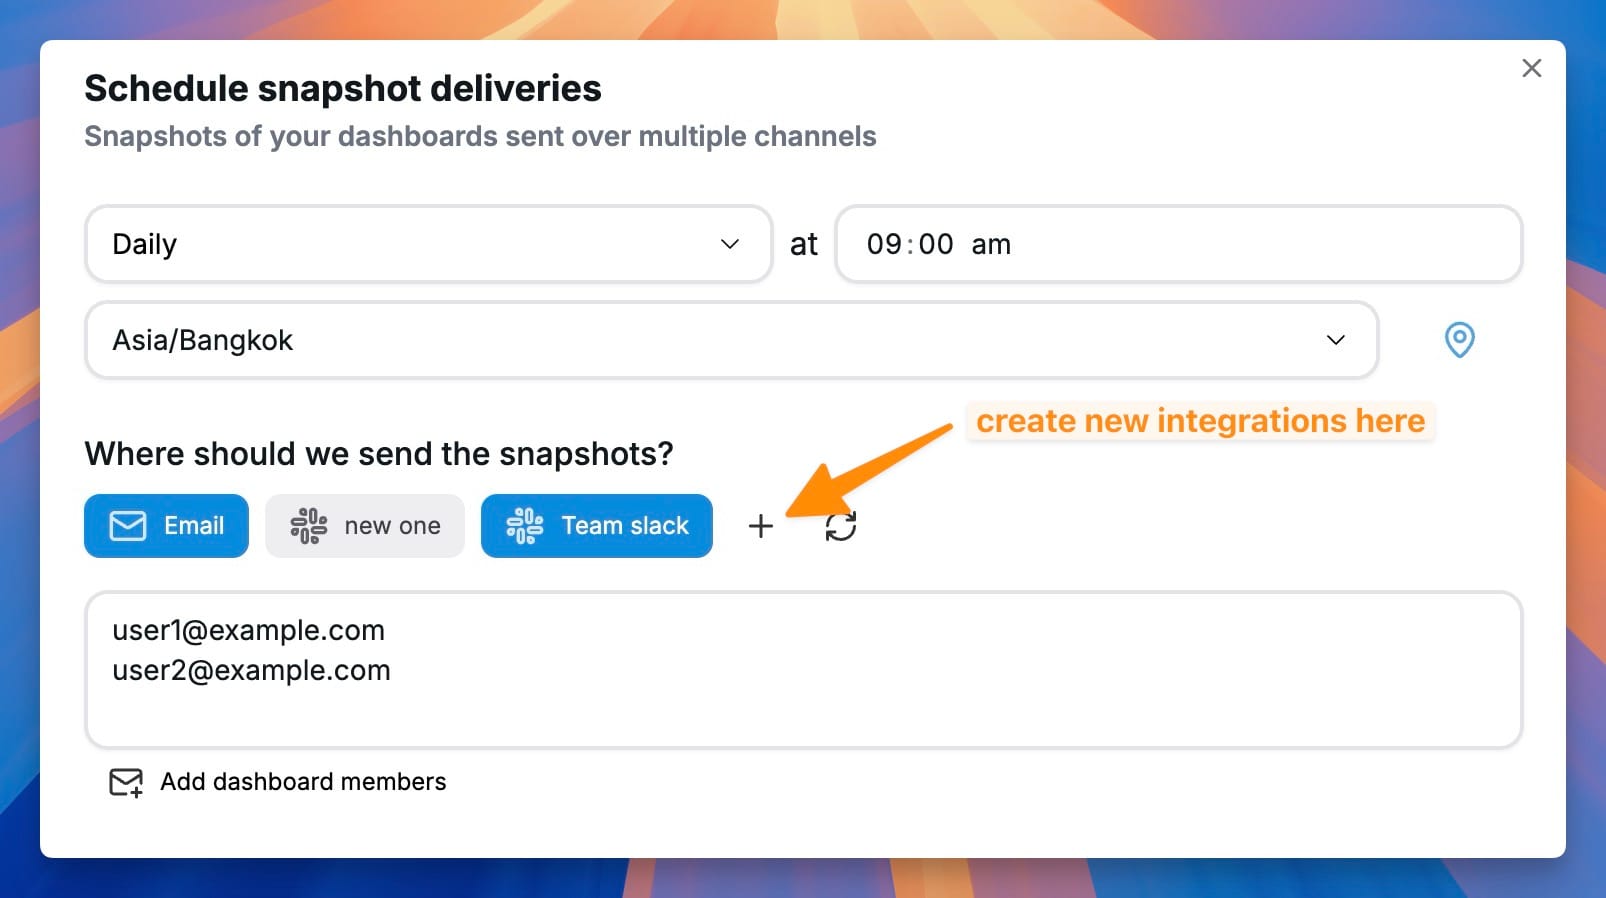
3. Select delivery channels
Choose one or more channels:
- Email — enter one address per line.
- Slack — toggle on to send snapshots to the Slack integration configured in your project. The Slack integrations can be identified by the Slack icon.
- Webhooks — toggle on to post a JSON payload with an image link to every active webhook.
You can create new integrations by clicking on the Add button. This opens your integrations page in a new tab. After you create the new integration, you can return to the original page and press the Refresh button.
4. Style the snapshot
Chartbrew renders an actual browser view of the dashboard, so you have full control over how it looks:
- Theme: Light or dark mode to match your brand.
- Header bar: Show or hide the dashboard title and date.
- Custom CSS: Strip injected CSS if it breaks the layout outside the app.
- Viewport width: Anything from 375 px (mobile) to 1920 px (ultra‑wide monitors).
The preview can be refreshed to ensure the recipients get the exact snapshot you intend to send.
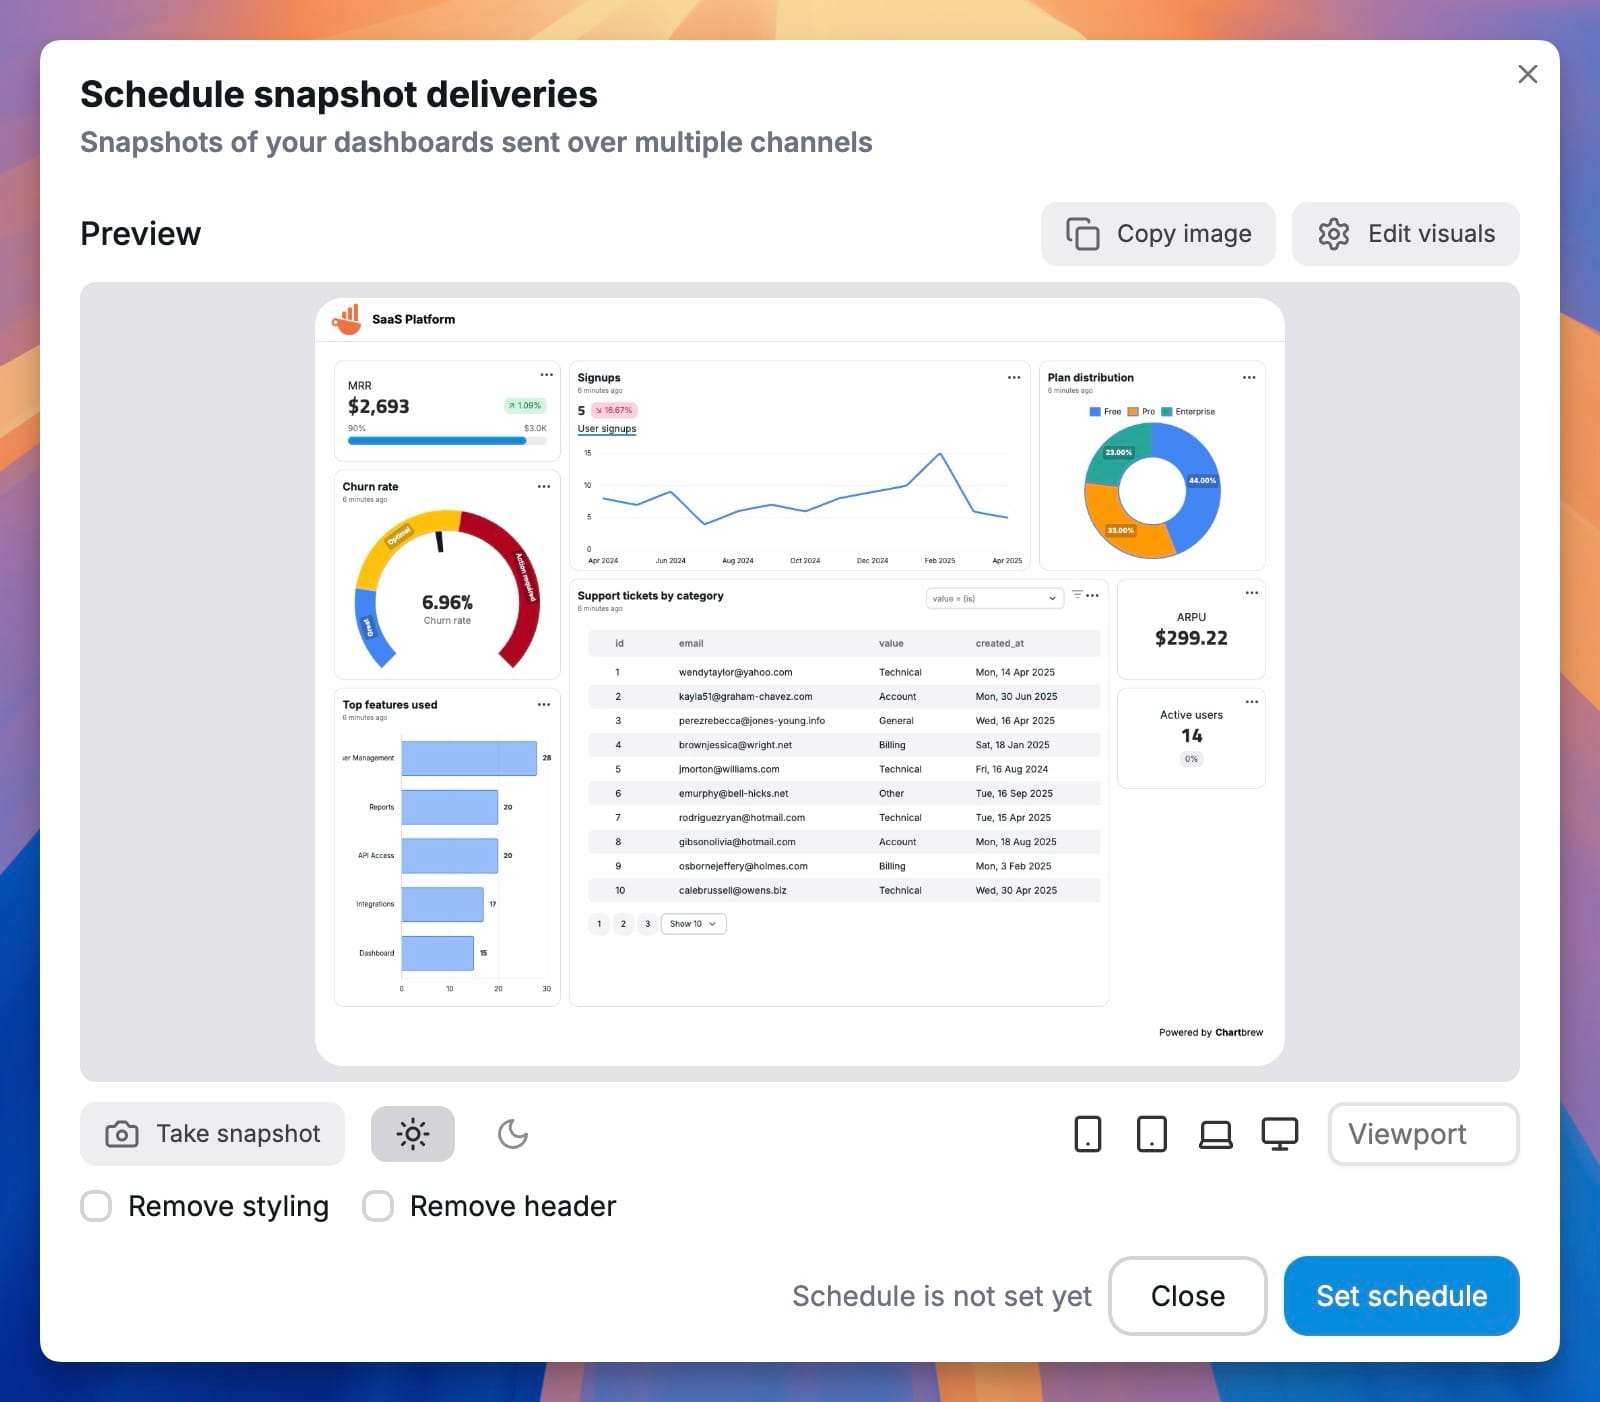
And that's it! Chartbrew will now create new snapshots according to the schedule and send it to all the channels that you configured.
Next steps
Want to improve your Chartbrew game? Have a read below on how to achieve even more with the platform:
- Create custom reports and share them with your clients
- Create dashboard templates so you can easily replicate visualizations
- Get started with Chartbrew's API to automate your reporting
Ready to impress clients with fresh data every morning?
now and set up your first automated snapshot.
